
The Soggy Spud Struggle: Why Most Roasted Potatoes Fall Flat
The scent of roasting vegetables promised so much, yet, all too often, the potatoes emerging from my oven were a cruel deception. A few years ago, after hosting a dinner party where my “crispy” roasted potatoes ended up more “sadly yielding” than “golden crunch,” I declared war on the soggy spud. I’d tried all the usual tricks: high heat, olive oil, a quick flip—but the results were consistently underwhelming. The promise of a truly crispy exterior and a fluffy interior felt like a mythical culinary beast, always just out of reach. It was this specific kitchen calamity, where potatoes sat forlornly next to a perfectly cooked roast, that ignited my quest for roasted potato perfection.
The Common Pitfalls: Undercooked Interiors, Bland Exteriors
Many home cooks wrestle with roasted potatoes that are either too soft, too hard, or just plain bland. The challenge often lies in achieving that delicate balance: cooking the potato all the way through without burning the outside, and simultaneously developing a flavorful, textured crust. Without the right technique, the potato’s high moisture content can steam itself, preventing any real crisping from happening.
The Deep-Fry Dilemma: Crispy but Unhealthy and Messy
Of course, deep frying is an easy route to crispy potatoes, but who wants the mess, the lingering oil smell, or the added fat for a simple weeknight side dish? My goal was always to achieve that same satisfying crunch with less fuss and a lighter touch, making it an everyday possibility rather than an occasional indulgence.
My Own Kitchen Calamity: A Personal Account of Mushy Misfortune
I remember one particularly frustrating evening when I was trying to recreate a dish from a Polish café I’d visited – beautifully seasoned, crunchy potatoes alongside a rich stew. Mine came out looking pale and tasting… well, like steamed potatoes that had wandered into an oven by mistake. My partner, ever supportive, still ate them, but the disappointment was mine alone. This mushy misfortune fueled my determination to find a better way, a game-changing method that would deliver truly crispy roasted potatoes every single time.
Unlocking the Golden Crunch: Our Game-Changing Method Revealed
This isn’t just another roasted potato recipe; it’s a culinary revelation that transforms humble potatoes into unbelievably crispy, golden-brown perfection without the mess or extra oil of deep frying. The improvisation that led to this recipe was born from countless experiments and a deep dive into the science of starch. The secret lies in a few simple, often overlooked steps that work together to create maximum surface area for crisping and an incredible texture.
What to expect: The Kitchen Reality Check
When you start with this method, the potatoes will look a bit rustic and even a little ‘shaggy’ after boiling and roughing up. Don’t panic if they seem uneven; this is precisely what we want! Those rough edges are going to turn into incredible crispy shards. The kitchen might get a little steamy during the pre-boil, but trust the process – the reward is worth it.
Step 1: Choosing Your Spuds Wisely (Starchy Varieties are Key)
For the ultimate crispy roasted potatoes, reach for starchy potatoes. Think Russet, Maris Piper, or King Edward. Their high starch content breaks down beautifully during boiling, creating a fluffy interior and a perfectly craggy surface for crisping. Waxy potatoes tend to hold their shape too well, limiting that desirable rough exterior.
Step 2: The Pre-Boil Secret (Baking Soda for Maximum Roughness)
This is where the magic truly begins! Adding a tiny bit of baking soda to the boiling water increases the pH, which helps to break down the potato’s pectin (the glue that holds cells together). This allows the outer layer to become wonderfully soft and floury, perfect for roughing up.
Step 3: The Rough-Up Ritual (Creating Craggy Surfaces for Crisping)
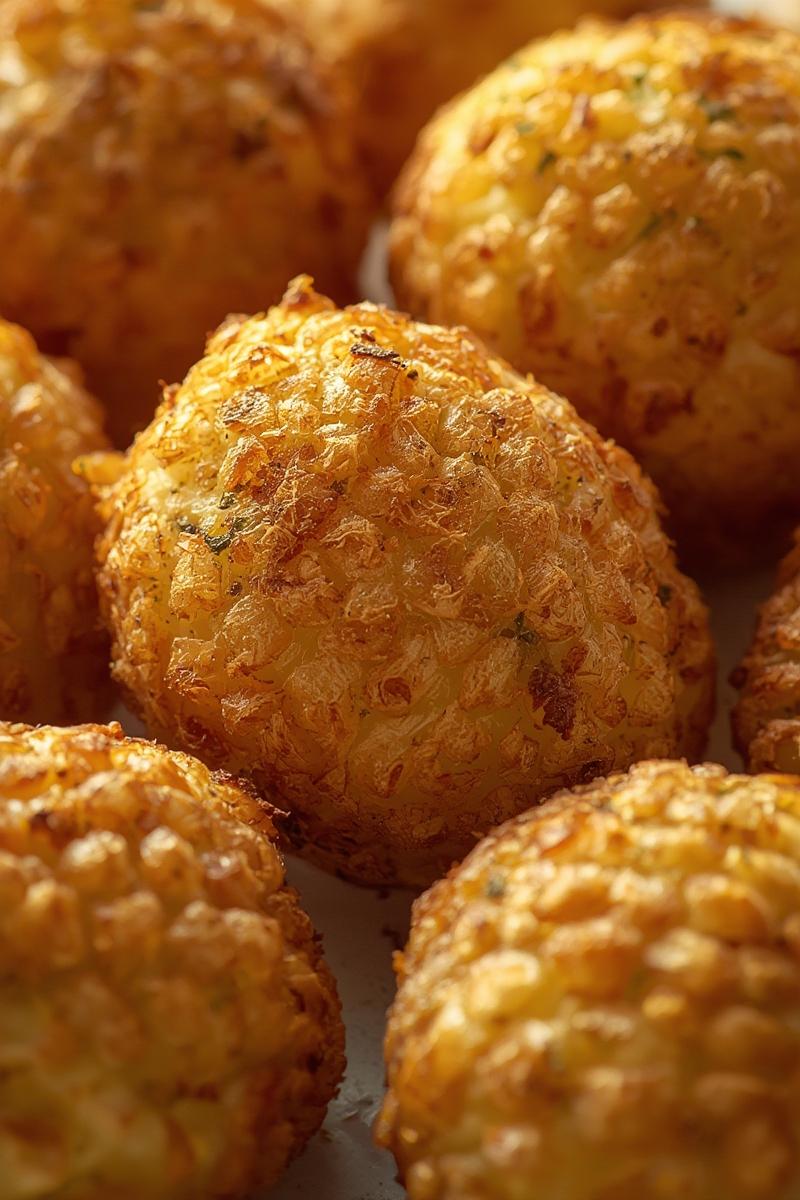
Once boiled, drain the potatoes thoroughly and return them to the empty, hot pot. Cover with a lid and give them a good, vigorous shake. This action “roughs up” the surface, creating countless tiny, floury edges and crags. These crags are essential because they maximize the surface area exposed to the hot oil, leading to an incredibly crispy crust.
Step 4: The Hot Fat Advantage (Rendered Fat vs. High-Smoke-Point Oil)
For truly irresistible flavor and crispiness, preheating your fat is non-negotiable. Using a rendered animal fat like duck fat or beef tallow (a staple in many traditional European kitchens, especially around holidays) imparts an incredible depth of flavor. If you prefer a vegetarian option, a high-smoke-point oil like avocado oil or even a good quality olive oil will also work beautifully, provided it’s piping hot when the potatoes go in.
Step 5: The Roasting Sweet Spot (Optimal Temperature and Time)
A high oven temperature is crucial for crisping. We’re aiming for a strong, consistent heat to encourage the Maillard reaction and quickly evaporate surface moisture.
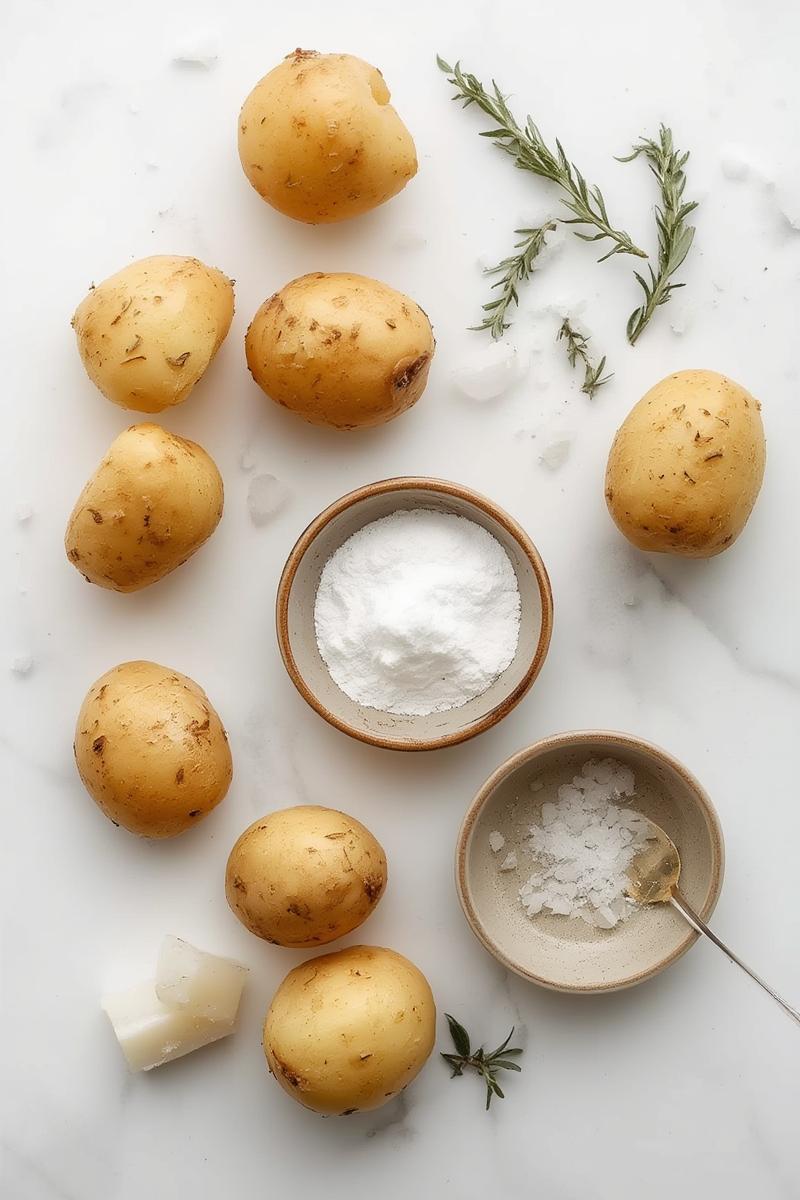
Ingredients (Serves 4-6 as a side):
- 2 lbs (about 1 kg) starchy potatoes (Russet, Maris Piper, King Edward), peeled and cut into 1.5-inch chunks
- 1/2 teaspoon baking soda
- 2-3 tablespoons duck fat, beef tallow, or high-smoke-point oil (like avocado oil)
- 1 teaspoon flaky sea salt
- 1/2 teaspoon freshly ground black pepper
- Optional: fresh rosemary sprigs, crushed garlic cloves for flavor
Market Note:
When selecting potatoes, look for those with smooth skins and no green spots or sprouts. They should feel firm and heavy for their size, indicating good moisture content without being overly watery.
Step-by-Step Instructions:
- Prep the Potatoes: Peel your potatoes and cut them into roughly 1.5-inch chunks. Try to make them as uniform as possible for even cooking. Place the cut potatoes in a large pot.
- Pre-Boil with Baking Soda: Cover the potatoes with cold water, adding about 1 inch above the potatoes. Stir in the 1/2 teaspoon of baking soda. Bring the water to a rolling boil over high heat, then reduce to a simmer and cook for 10-12 minutes, or until the edges of the potatoes just begin to look tender and a little crumbly when poked with a fork. They should not be fully soft.
- Drain and Rough Up: Carefully drain the potatoes in a colander. Return the drained potatoes to the empty, hot pot. Cover the pot with a tight-fitting lid and shake vigorously for about 30-60 seconds. You’ll hear them knock against each other, creating those essential craggy, floury surfaces. This is the secret to maximum crisp!
- Preheat Oven and Fat: While the potatoes are boiling, preheat your oven to 425°F (220°C). Place your chosen fat (duck fat, tallow, or oil) in a large, sturdy roasting pan and put it in the oven to heat up for at least 10-15 minutes. It should be shimmering hot when you add the potatoes.
- Toss and Roast: Carefully remove the hot roasting pan from the oven. Add the roughed-up potatoes to the hot fat. Season with salt and pepper, and add any optional herbs or garlic now. Toss gently to ensure each potato piece is coated in the hot fat. Spread them out in a single layer, ensuring they aren’t overcrowded. This is critical for crisping; if you have too many potatoes, use two pans.
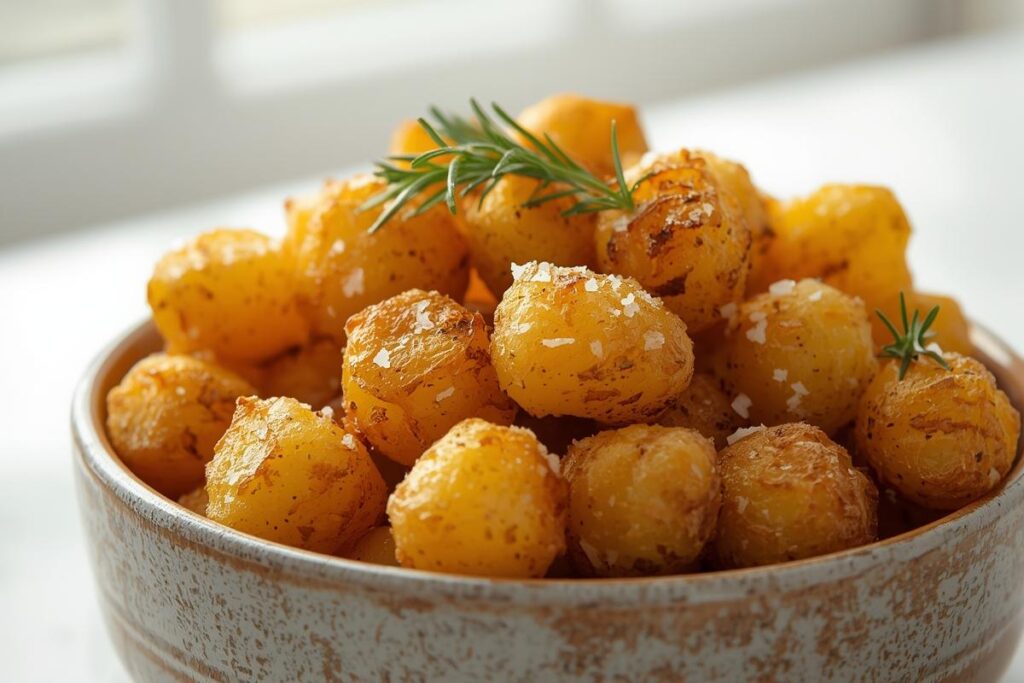
- The Golden Roast: Return the pan to the hot oven and roast for 45-60 minutes, or until deeply golden brown and incredibly crispy. Flip them halfway through to ensure even browning on all sides. You’ll know they’re ready when they’re gloriously golden, audibly crunchy, and wonderfully fluffy inside.
The Science Behind the Crunch: Why This Hack Works Every Time
Understanding why something works makes you a better, more confident cook! This method isn’t just a series of steps; it’s a clever manipulation of potato chemistry and physics.
Starch Gelatinization & Surface Area: The Baking Soda Effect Explained
When you boil the potatoes with baking soda, the alkaline environment breaks down the pectin on the surface of the potatoes. This allows the starch granules to absorb more water and expand, or “gelatinize,” creating a soft, almost mushy outer layer. When you “rough up” the potatoes, this gelatinized starch layer gets scraped and fluffed, creating a massive increase in surface area. Think of it like a tiny, starchy sponge with countless nooks and crannies, all ready to get crispy.
The Maillard Reaction: Unlocking Deep Flavor & Golden Color
The Maillard reaction is a complex chemical process responsible for the browning and deep, savory flavors we love in roasted foods. It occurs when amino acids and reducing sugars react at high temperatures. The baking soda method, by creating that rough, starchy surface, provides the perfect canvas for the Maillard reaction to go wild, giving you that irresistible golden-brown color and rich, nutty flavor.
Moisture Management: Achieving the Fluffy Interior and Crispy Exterior
The initial boil tenderizes the potato’s interior while the rough surface ensures maximum moisture evaporation during roasting. The hot oven and hot fat rapidly dry out the surface, preventing steaming and promoting that beautiful, dry crispness. Meanwhile, the perfectly cooked interior remains wonderfully soft and fluffy.
Elevate Your Roasties: Flavor Variations & Serving Suggestions
Once you’ve mastered the basic technique, feel free to play! That’s the joy of home cooking—making a recipe your own.
Herb Infusions: Rosemary, Thyme, Garlic, Sage
Toss fresh sprigs of rosemary or thyme with the potatoes before roasting. For a garlicky kick, add a few smashed cloves of garlic to the pan, letting them infuse the hot fat. Sage leaves become wonderfully crisp when roasted alongside the potatoes.
Spice It Up: Paprika, Cumin, Chili Flakes
A sprinkle of smoked paprika can add a beautiful color and smoky depth. Cumin powder or a pinch of chili flakes can introduce a lovely warmth. I sometimes add a dash of my homemade spice blend, inspired by my trips to spice markets!
Finishing Touches: Flaky Salt, Fresh Parsley, Parmesan Dust
A final sprinkle of flaky sea salt just before serving enhances the crunch and flavor. Freshly chopped parsley adds a pop of color and freshness. For an extra savory treat, dust with finely grated Parmesan cheese immediately after they come out of the oven.
Perfect Pairings: What to Serve with Your Crispy Creations
These crispy roasted potatoes are the ultimate versatile side. They’re fantastic alongside a Sunday roast chicken, a juicy steak, or even a simple pan-fried fish. They’re also an incredible addition to a hearty meal like this Low-FODMAP Chicken & Rice Casserole, offering a textural counterpoint.
Troubleshooting & FAQs: Achieving Potato Perfection
Every kitchen has its quirks, and sometimes things don’t go exactly to plan. Here are some common questions and fixes.
My Potatoes Aren’t Crispy Enough! (Common fixes)
Did you overcrowd the pan? Potatoes need space to breathe and crisp. If they’re too close, they’ll steam instead of roast. Use two pans if necessary. Also, ensure your oven was fully preheated and the fat was shimmering hot when the potatoes went in. Don’t be afraid to give them a few extra minutes if they need it; sometimes ovens can vary.
Can I Prepare Them Ahead? (Partial cooking/storage tips)
You can peel, cut, and par-boil the potatoes with baking soda ahead of time. After the rough-up ritual, let them cool completely, then spread them in a single layer on a baking sheet and refrigerate for up to 24 hours. When ready to roast, simply proceed with Step 4. This is a fantastic trick for holiday meals, much like preparing components for overnight oats.
Best Fats for Roasting? (Duck fat, beef tallow, olive oil, avocado oil)
Duck fat and beef tallow offer superior flavor and crispness due to their high smoke points and rich taste. For vegetarian options, avocado oil is excellent for its high smoke point and neutral flavor, allowing the potato to shine. Good quality olive oil also works but ensure it’s not extra virgin if you’re roasting at very high temperatures, as it has a lower smoke point.
Air Fryer Adaptation? (Brief mention/comparison)
Yes, this method works beautifully in an air fryer! Follow the same pre-boil and rough-up steps. Then, preheat your air fryer to 400°F (200°C), toss the potatoes with a tablespoon of oil/fat, and cook for 20-30 minutes, shaking the basket every 7-10 minutes, until golden and crispy. The results are remarkably similar to oven-roasted, with potentially less cooking time!
What About Different Potato Varieties?
While starchy potatoes are ideal for this method, you can achieve good results with all-purpose varieties like Yukon Golds. They won’t get quite as craggy, but their flavor is wonderful, and they’ll still be much crispier than with traditional roasting methods. Head over to Smartly Recipes for more tips on choosing the right produce for your dishes.
The journey to consistently crispy roasted potatoes, once fraught with frustration, has become a genuine kitchen joy. This method truly delivers that golden, crunchy exterior and fluffy interior we all dream of. I’d love to know what personal touches you add to make these ultimate crispy roasted potatoes your own. Did you experiment with a unique spice blend, or find a perfect pairing for your family meal?