

Prepping chicken breasts smart can transform your weeknight cooking from a frantic rush into a smooth, enjoyable process, consistently delivering juicy, flavorful meals that cook in a flash. This guide will walk you through a definitive, step-by-step method that not only prevents the dreaded dry chicken but also significantly cuts down on your dinner prep time, empowering you to create delicious dishes even on the busiest evenings.
Table of Contents
The Dry Chicken Dilemma: My Own Kitchen Confession
I still remember the “Great Chicken Breast Disaster of ’09.” It was a Tuesday evening, I had ambitious plans for a quick pan-seared lemon chicken, and I was convinced I had it all under control. I’d just come back from a particularly inspiring walk through the local farmer’s market, brimming with ideas for fresh herbs. The chicken breasts, however, were thick, uneven, and straight from the package. Despite my best efforts to cook them quickly, I ended up with a piece of chicken that was charred on the outside and still stubbornly pink in the middle, or, conversely, cooked through but so dry it resembled shoe leather. My partner, ever so kind, bravely choked it down while I silently vowed to find a better way. It was a humbling moment, but it sparked a relentless quest to conquer the chicken breast and unlock its juicy potential.
That night, I realized I wasn’t alone in this struggle. So many home cooks face the same predicament: chicken breasts are versatile, lean, and readily available, but they have a notorious reputation for drying out. We want them fast, but we also want them tender and flavorful. This frustration is precisely what led me down a rabbit hole of kitchen experiments, all to discover a method that guarantees success every single time. And today, I’m thrilled to share that ‘Smart Prep’ method with you!
Unlock the Secret: The ‘Smart Prep’ Method for Perfect Chicken
After years of trial and error (and more than a few dry dinners!), I’ve developed a foolproof method that tackles the inherent challenges of cooking chicken breasts head-on. This isn’t just about cutting calories; it’s about smart cooking that locks in moisture and infuses flavor, making your weeknight dinners a breeze. The key lies in a little prep work upfront that pays dividends throughout the week.
Gathering Your Arsenal: Tools for Success
Before we dive in, let’s make sure you have a few essential tools on hand. You don’t need fancy gadgets, just some trusty kitchen companions:
- Meat Mallet or Heavy Rolling Pin: For achieving that perfect, even thickness.
- Sharp Chef’s Knife: Essential for trimming and portioning.
- Sturdy Cutting Board: A large one is always a good idea for poultry.
- Plastic Wrap or Zip-Top Bags: For pounding and marinating.
- Airtight Containers or Freezer Bags: For smart storage.
- Shallow Dish or Bowl: For brining or marinating.
Step 1: The Art of Even Pounding (No More Tapered Ends!)
This step is non-negotiable for juicy chicken! Most chicken breasts are thicker at one end and taper down. This unevenness is the root cause of dry chicken because the thin parts cook faster and dry out while you wait for the thick parts to catch up.
- Butterfly (Optional, but Recommended): If your chicken breast is particularly thick, you can butterfly it. Lay it flat on your cutting board, place your hand on top, and carefully slice horizontally through the thickest part, stopping just before you cut all the way through. Open it up like a book.
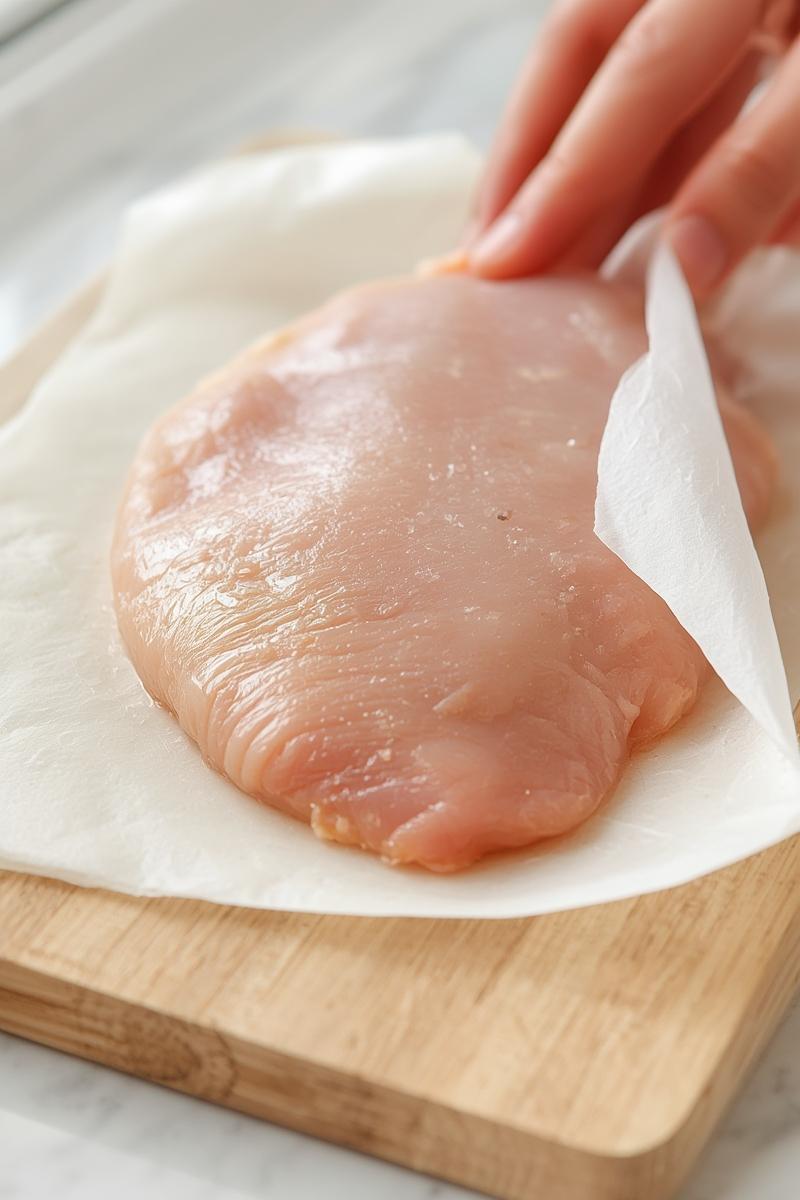
- Cover and Pound: Place a chicken breast between two sheets of plastic wrap or inside a large, heavy-duty zip-top bag. Using the flat side of your meat mallet (or a rolling pin), gently but firmly pound the chicken breast, starting from the thickest part and working your way outwards.
- Achieve Even Thickness: Your goal is to get the entire breast to about ¾-inch to 1-inch thickness. This ensures every part cooks at the same rate, guaranteeing tenderness throughout. If the chicken looks a bit wonky or a little ragged around the edges, don’t worry! It’ll still cook up beautifully and taste wonderful. The beauty of home cooking is that it doesn’t have to be picture-perfect to be delicious.
Step 2: The Quick Brine or Marinade Magic (Flavor & Moisture Lock)
This is where the flavor party begins and moisture is truly sealed in. Brining adds moisture through osmosis, while marinating adds flavor and can tenderize. Choose one or both!
- The Quick Brine (15-30 minutes): For every cup of water, dissolve 1 tablespoon of salt. Submerge your pounded chicken breasts in this solution for 15-30 minutes. This simple trick works wonders! Rinse the chicken thoroughly after brining and pat dry.
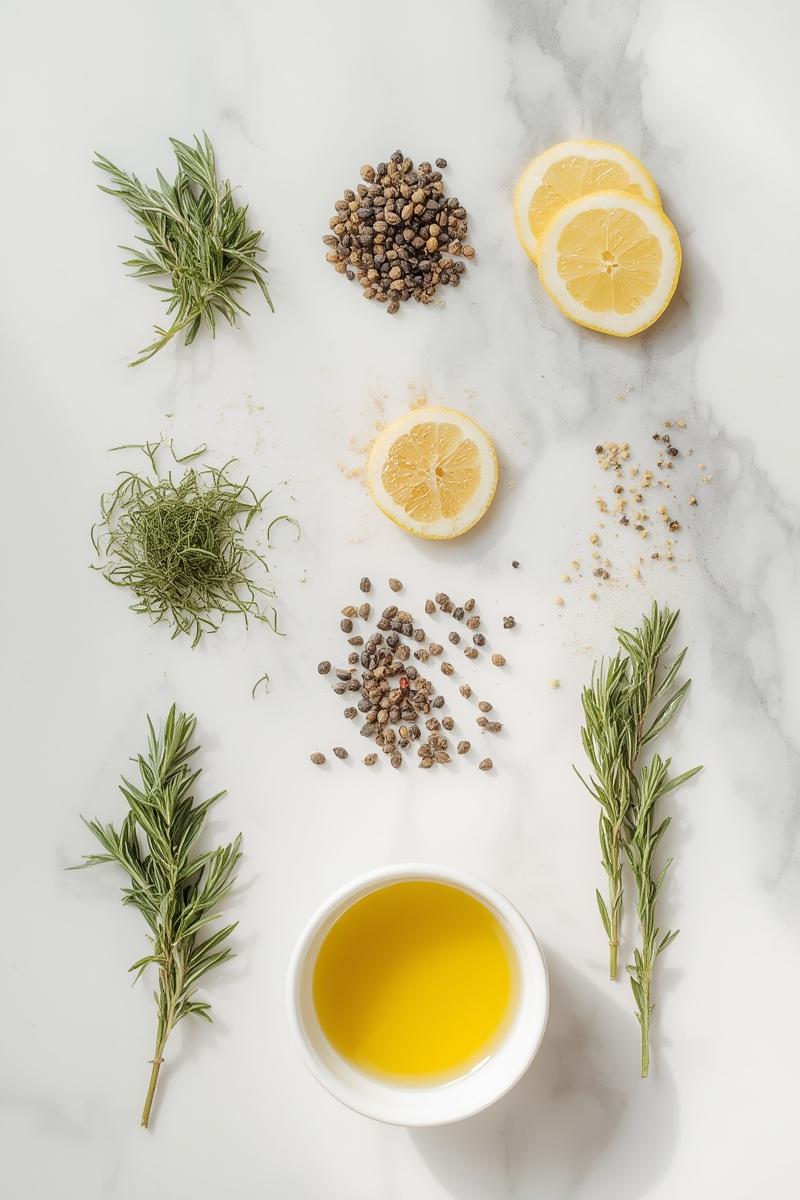
- The Marinade Magic (30 minutes to overnight): After pounding, this larger surface area means marinades penetrate much more effectively. My go-to quick marinade is a mix of olive oil, lemon juice, minced garlic, fresh or dried herbs (like oregano, thyme, or rosemary), a dash of Dijon mustard, salt, and pepper. You can also go for an Asian-inspired marinade with soy sauce, ginger, garlic, and a touch of sesame oil.
Market Note: When grabbing ingredients for your brine or marinade, look for bright, firm lemons with smooth skin – they’re typically juicier. For herbs, seek out vibrant, unwilted bunches with a strong, fresh aroma. These small details make a big difference in the final flavor!
Step 3: Portioning & Smart Storage for Instant Dinners
Now that your chicken is perfectly prepped, let’s make it ready for those busy weeknights.
- Portioning: Decide how you’ll use the chicken. Will it be for stir-fries, tacos, salads, or whole pieces? Slice the pounded and brined/marinated chicken into strips, cubes, or leave whole, depending on your typical meal plans.
- Smart Storage: Place portioned chicken in individual freezer-safe bags or airtight containers. Label them with the date and what’s inside (e.g., “Pounded Lemon-Herb Chicken, 3/10”). This is a game-changer! You can store them in the fridge for 2-3 days or freeze for up to 3 months.
Beyond the Chop: Why This Prep Technique is a Game Changer
This isn’t just a list of steps; it’s a philosophy for smarter, more enjoyable cooking. Each part of this prep method serves a crucial purpose, transforming those once-dreaded chicken breasts into a weeknight hero.
The Science of Even Cooking: Say Goodbye to Dry Spots
The beauty of pounding your chicken breasts to an even thickness lies in the fundamental principles of heat transfer. When all parts of the chicken are the same thickness, they cook at the same rate. This eliminates the frustrating dilemma of having one end perfectly cooked and tender, while the thicker end is either undercooked or, in your valiant efforts to cook it through, the thinner end becomes dry and rubbery. Evenly pounded chicken cooks faster and more uniformly, guaranteeing a juicy result every single time. It’s truly a secret weapon for anyone who’s ever overcooked a piece of chicken.
Infusing Flavor: Marinades That Actually Work
Pounding the chicken not only ensures even cooking but also increases the surface area, allowing marinades and brines to penetrate much more effectively. When chicken breasts are thick and dense, marinades tend to only flavor the very surface. But with a thinner, larger piece, that aromatic garlic, bright lemon, or savory soy sauce can truly work its magic, infusing flavor deep into the muscle fibers. Brining, on the other hand, helps the chicken retain moisture during cooking, resulting in a more tender and juicy texture. It’s like giving your chicken a little spa treatment before its big performance!
Reclaiming Your Weeknights: The Ultimate Time Saver
This is perhaps the biggest win for busy home cooks. Imagine walking into the kitchen after a long day, opening the fridge, and pulling out perfectly prepped, flavorful chicken that’s ready to hit the pan. No more scrambling to defrost, pound, or season last minute. This ‘smart chicken breast prep’ takes away the mental load and the physical effort from your busiest evenings. It’s the ultimate form of kitchen improvisation – having exactly what you need, when you need it. This means more time enjoying your dinner, less time stressing over it, and more energy for those evening walks or catching up on your favorite podcasts.
Dinner is Served: Quick Meals with Your Prepped Chicken Breasts
Now for the fun part – turning that wonderfully prepped chicken into fantastic meals! The possibilities are endless, but here are a few ideas to get you started, proving just how much time you’ve saved.
Zesty Lemon-Herb Skillet Chicken (15-Minute Recipe Idea)
Heat a skillet with a drizzle of olive oil. Sear your prepped, lemon-herb marinated chicken breasts for 3-4 minutes per side until golden brown and cooked through. The thinness means they cook incredibly fast! Finish with a squeeze of fresh lemon and a sprinkle of chopped parsley. Serve with a quick side of steamed green beans or a simple quinoa salad. The aroma of searing lemon and herbs will fill your kitchen, promising a bright and satisfying meal!
Speedy Asian-Inspired Chicken Stir-Fry (Perfect for Leftovers)
If you’ve prepped your chicken into strips or cubes, this is lightning-fast. Heat a wok or large skillet with a tablespoon of sesame oil. Toss in your prepped chicken, then add a medley of quick-cooking veggies like bell peppers, snap peas, and shredded carrots. Whisk together a quick sauce of soy sauce, ginger, garlic, and a touch of honey or maple syrup, then pour it over everything. Cook until the chicken is tender and the veggies are crisp-tender. This is a fantastic way to transform humble ingredients, much like how a few simple tricks can turn chickpeas into incredible meals – if you’re curious, check out our article on 7 Chickpea Meal Transformations for more inspiration!
Quick Chicken Caesar Wraps or Salads (No-Cook Assembly)
For those days when cooking feels like too much effort, your prepped chicken is a lifesaver. Simply slice your cooked, chilled chicken into strips (cook an extra piece during your prep for this!). Toss with crisp romaine lettuce, croutons, and your favorite Caesar dressing for a classic salad, or wrap it all up in a whole-wheat tortilla with a slice of cheese for a satisfying wrap. This approach is so simple, it almost feels like cheating. It makes me think about how easy it is to elevate other simple dishes, like those fluffy keto pancakes we love on a weekend morning – a little prep, a big reward!
And for those chicken scraps or trimmings from your initial prep, don’t toss them! Pop them into a freezer bag with other veggie scraps and bones to make a delicious homemade stock later – it’s wonderful for soups and stews.
Mastering this smart chicken breast prep method will genuinely change how you approach weeknight dinners. No more dry chicken, no more last-minute stress, just consistently delicious and juicy meals whenever you need them. Give it a try, and let me know how you use your perfectly prepped chicken! Did you create an amazing new stir-fry, or perhaps invent a delightful chicken taco night? I’d love to hear if you added your own twist or discovered a new favorite way to enjoy your juicy chicken!