
Fixing crumbly gluten-free baking ensures moist, delicious results every time. This guide provides practical, actionable ‘Smartly secrets’ to rescue your gluten-free bakes from dry, crumbly disasters, focusing on both the ‘why’ and ‘how’ for lasting success in your kitchen.
The Gluten-Free Baking Disaster: When Crumbles Attack
My Own Crumbly Catastrophe
I remember the morning I proudly pulled a batch of gluten-free blueberry muffins from the oven, the aroma promising pure delight. But as I went to share them with my friends for our brunch gathering, they crumbled right in my hand, scattering a sad pile of dry bits onto the plate. The beautiful dome tops, the golden-brown crust – all a cruel illusion! My heart sank, not just for the lost muffins, but for the collective sigh of disappointment from my guests. It was a humbling moment, a vivid reminder that gluten-free baking, while incredibly rewarding, demands a little extra understanding and a few clever tricks up your sleeve.
The All-Too-Common Frustration of Dry GF Bakes
Many of us who embrace the gluten-free kitchen have faced this exact frustration. You follow a recipe diligently, measure everything precisely, and yet your cookies fall apart, your cakes are brick-like, and your breads could double as doorstops. It’s easy to feel defeated, thinking gluten-free baking is simply destined to be dry and crumbly. But I’m here to tell you that’s simply not true! Achieving a beautifully moist, tender crumb in gluten-free bakes is absolutely within reach, and often, it comes down to a few fundamental adjustments and a sprinkle of kitchen wisdom.
Why Your Gluten-Free Bakes Fall Apart: The Science Behind the Crumbles
Understanding why gluten-free bakes behave differently is the first step toward mastering them. It’s not magic; it’s science!
The Missing Gluten Matrix: What It Means for Structure
At its core, gluten is a protein network that provides elasticity, structure, and chewiness to traditional baked goods. It traps gases, allowing bread to rise and cakes to hold their shape. When gluten is absent, we lose that natural ‘glue’ and framework. Without a strong, flexible matrix, gluten-free flours struggle to bind together, leading to a weak structure that easily crumbles. This is why simply swapping wheat flour for a single gluten-free flour rarely works without other adjustments.
Thirsty Flours: Why GF Grains Absorb More Liquid
Many gluten-free flours, particularly starches like tapioca and potato, or protein-rich flours like almond and coconut, are incredibly absorbent. They soak up liquid at a different rate and to a greater extent than wheat flour. If your recipe doesn’t account for this increased thirst, your batter or dough will be too dry from the start, setting you up for crumbly failure before it even hits the oven.
The Delicate Balance: Fat, Sugar, and Moisture in GF Recipes
In gluten-free baking, fat and sugar play an even more critical role than in their gluten-containing counterparts. Fats like butter, oil, or even mashed avocado contribute moisture, richness, and tenderness by shortening gluten strands (or in our case, simulating that effect). Sugars not only sweeten but also attract and retain moisture, keeping bakes soft and preventing staleness. An imbalance here—too little fat or sugar—can quickly lead to a dry, crumbly result.
Overbaking: The Silent Killer of Tenderness
Even with a perfectly formulated gluten-free recipe, overbaking is the quickest way to turn a moist treat into a dry, crumbly disappointment. As baked goods cook past their optimal point, moisture evaporates, leaving behind a dry, brittle texture. Gluten-free items can often look underdone when they are actually perfectly cooked, so learning to recognize the visual and tactile cues is crucial.
The Smartly Fix: Hacks for Moist, Tender Gluten-Free Texture
Now for the exciting part! These are the ‘Smartly secrets’ I’ve gathered through countless baking experiments and a few glorious mishaps.
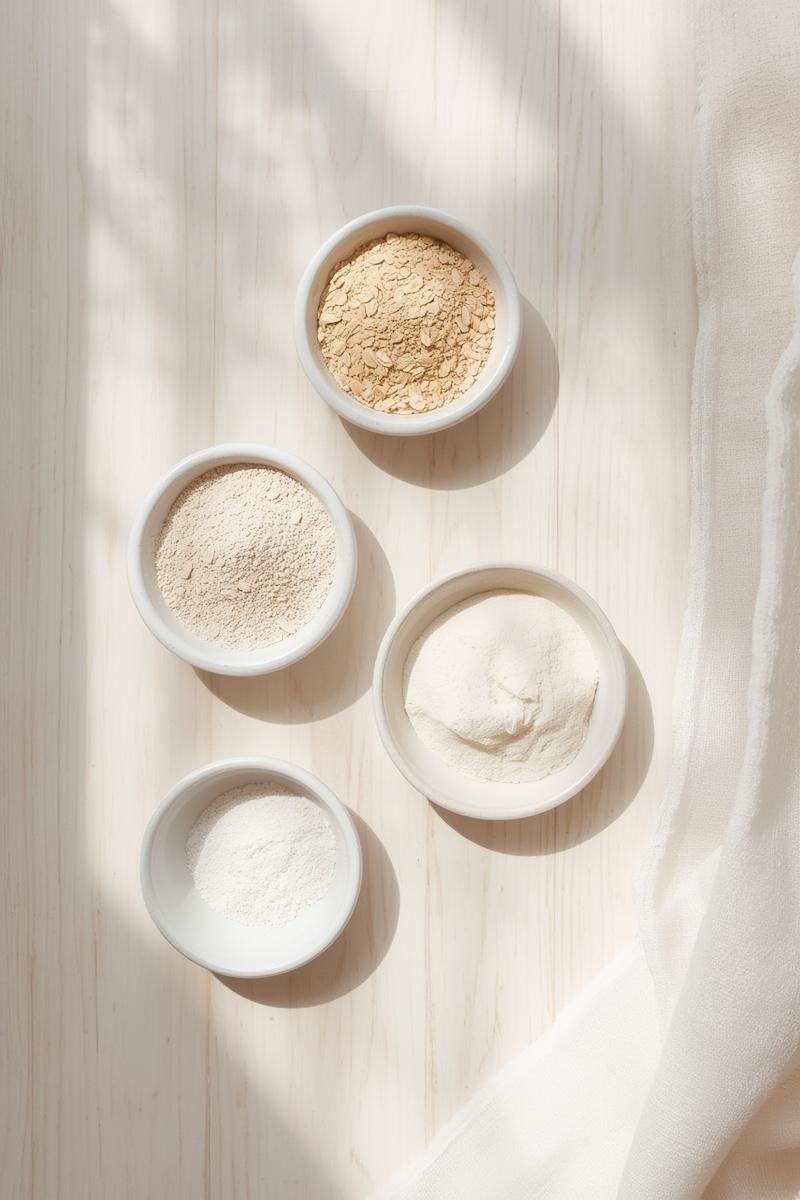
Master Your Flour Blends: Beyond Single-Grain Reliance
The biggest mistake in gluten-free baking is using a single gluten-free flour as a direct swap for wheat flour. Think of gluten-free flour as a team, not a solo act!
- Starches for Lightness & Binding: Tapioca starch, cornstarch, or potato starch (not flour!) add elasticity and help bind ingredients. They give that desirable chewiness.
- Whole Grain Flours for Flavor & Structure: Brown rice flour, oat flour (look for certified gluten-free!), or sorghum flour add nutty flavors and some structure.
- Nut Flours for Moisture & Tenderness: Almond flour or hazelnut flour contribute richness, protein, and a lovely tender crumb.
- My Tip: I often start with a blend of 40% whole grain, 30% starch, and 30% nut flour for a balanced base. Don’t be afraid to experiment!
Hydration Heroes: Boosting Moisture from Within
Since GF flours are thirsty, give them more to drink!
- Increase Liquid: Often, a recipe just needs a splash more milk, water, or even a bit of fruit juice. Add slowly, aiming for a slightly looser batter than you might expect for a gluten-containing recipe.
- Moisture-Rich Add-ins: Plain yogurt, applesauce, mashed banana, pumpkin puree, or even puréed silken tofu can work wonders. They add not just liquid, but also pectin or fats that help keep things moist. I recently added a dollop of Greek yogurt to my gluten-free cornbread and it was a game-changer!
- Market Note: When picking apples for applesauce, I always look for crisp, slightly tart varieties like Honeycrisp or Granny Smith at my local farmers’ market. They lend a lovely balance to sweet baked goods.
Fat is Your Friend: Adding Richness and Tenderness
Fat is a crucial moisture carrier and crumb tenderizer in gluten-free baking.
- Butter & Oils: Don’t skimp! Use good quality butter, coconut oil, or a neutral oil like grapeseed or avocado. Sometimes just an extra tablespoon can make all the difference.
- Nut Butters: Peanut butter, almond butter, or cashew butter add richness, flavor, and a fantastic, dense moistness to cookies and brownies.
- Avocado: Mashed avocado can be a surprisingly good fat substitute, especially in chocolate-based recipes where its color is hidden.
Binding Agents: The Glue Your Bakes Need
Without gluten, we need alternative binders to hold everything together.
- Xanthan Gum: This is the most common and effective. It mimics gluten’s elasticity. Use sparingly (typically 1/4 to 1/2 teaspoon per cup of GF flour blend) – too much can make things gummy.
- Psyllium Husk: A powerful fiber that absorbs a lot of water and creates a gel-like consistency, offering structure and elasticity, especially great for breads. Start with 1-2 teaspoons per cup of GF flour.
- Ground Flaxseed or Chia Seeds (Flax/Chia Eggs): When mixed with water (1 tbsp ground seeds + 3 tbsp water per egg), they form a gel that helps bind and adds moisture. Great for muffins and cookies.
The Power of Sugar: Beyond Sweetness and Flavor
Sugar does more than just sweeten; it helps retain moisture and promotes a tender crumb.
- Types of Sugar: Brown sugar, honey, and maple syrup are particularly good moisture providers due to their humectant properties. Sometimes swapping a portion of white sugar for brown sugar can improve texture.
- Molasses: A little molasses in recipes like gingerbread or dark chocolate cookies adds incredible depth of flavor and moisture.
The Perfect Bake Time: Don’t Let it Dry Out
This is where many crumbly tragedies begin.
- Watch, Don’t Just Time: Ovens vary wildly! Start checking for doneness 5-10 minutes before the recipe suggests.
- Visual Cues: For cakes and muffins, a wooden skewer inserted into the center should come out clean or with moist crumbs attached (not wet batter). For cookies, edges should be lightly golden, centers still slightly soft.
- Cooling is Crucial: Many gluten-free baked goods continue to cook as they cool. Allow them to cool completely in their pan or on a wire rack before cutting. Trying to cut a warm gluten-free cake often leads to crumbling.
Prevention Tips: Baking Smarter, Not Harder for Lasting Success
Beyond the fixes, adopting these habits will lead to consistently fantastic gluten-free bakes.
Accurate Measuring: The Foundation of Flawless Texture
Baking is a science, and even more so with gluten-free ingredients.
- Weigh Your Flours: This is my number one tip! Using a kitchen scale (grams are best) ensures precise measurement, which is crucial since flours pack differently in cups.
- Level Scoops: If measuring by volume, spoon flour into your measuring cup and level it off with a straight edge. Don’t pack it down!
Embrace Room Temperature Ingredients
This might seem minor, but it makes a big difference. Room temperature butter, eggs, and dairy emulsify better, creating a smoother batter and a more uniform texture. This ensures that all ingredients integrate seamlessly, leading to a more consistent bake.
Rest Your Dough and Batters: The Patience Payoff
Letting your gluten-free dough or batter rest for 15-30 minutes (or even overnight for some recipes) allows the flours to fully hydrate. This softens any grittiness and helps the binding agents work their magic, leading to a smoother texture and less crumble. It’s like giving the ingredients a chance to get to know each other.
The Right Storage Matters: Keeping Bakes Fresh
Once your beautiful gluten-free creation is baked, proper storage is key to maintaining its moisture.
- Airtight Containers: Always store gluten-free bakes in an airtight container at room temperature or in the fridge, depending on the ingredients. This prevents moisture loss.
- Freezing: Many gluten-free items freeze beautifully. Wrap individual portions tightly in plastic wrap and then foil to prevent freezer burn.
- Sustainability Tip: Use beeswax wraps or reusable silicone bags to store leftover baked goods, reducing single-use plastic.
Troubleshooting Common GF Crumbles: Quick Fixes
- Too Dry After Baking? If a cake or quick bread is slightly dry, a simple syrup (equal parts sugar and water, simmered until dissolved) brushed generously over the warm surface can reintroduce moisture.
- Cookies Falling Apart? Next time, add a touch more fat or a flax egg. If they’re already baked, you can try crushing them for a topping on yogurt or ice cream – a delicious rescue!
- Remember: Even my most crumbled creations have found a second life as delicious crusts for cheesecakes or as crumbles over fruit. Nothing truly goes to waste in a Smartly kitchen! Just like learning to make perfectly crispy roasted potatoes or deciding between air fryer vs. oven potatoes, it’s all about experimentation and learning the nuances of your ingredients and equipment. And for roasted veggies, understanding the air fryer vs. oven debate can also save you from a soggy situation.
Your Gluten-Free Baking Rescue Mission: Concluded with Confidence
Embracing gluten-free baking means embracing a slightly different approach, but it doesn’t mean sacrificing deliciousness or texture. By understanding the ‘why’ behind the crumbles and applying these Smartly hacks—from mastering flour blends to perfecting bake times—you’ll transform your kitchen into a haven of moist, tender, and utterly delightful gluten-free creations. Don’t let a few past mishaps deter you; every bake is a new opportunity to learn and grow.
I’m always eager to hear about your kitchen adventures! What’s your go-to gluten-free flour blend, or have you discovered a secret ingredient that transformed your crumbly bakes into tender triumphs? I’d love to know if you added your own twist!