
Achieving perfectly moist, fluffy gluten-free muffins can feel like a culinary riddle. This guide unravels the common mysteries behind crumbly textures, dry interiors, and dense results. We’ll troubleshoot every potential pitfall, equipping you with the know-how to bake bakery-quality gluten-free muffins every single time.
My Kitchen Catastrophe: The Crumbly Muffin Saga
The Gluten-Free Baking Gauntlet
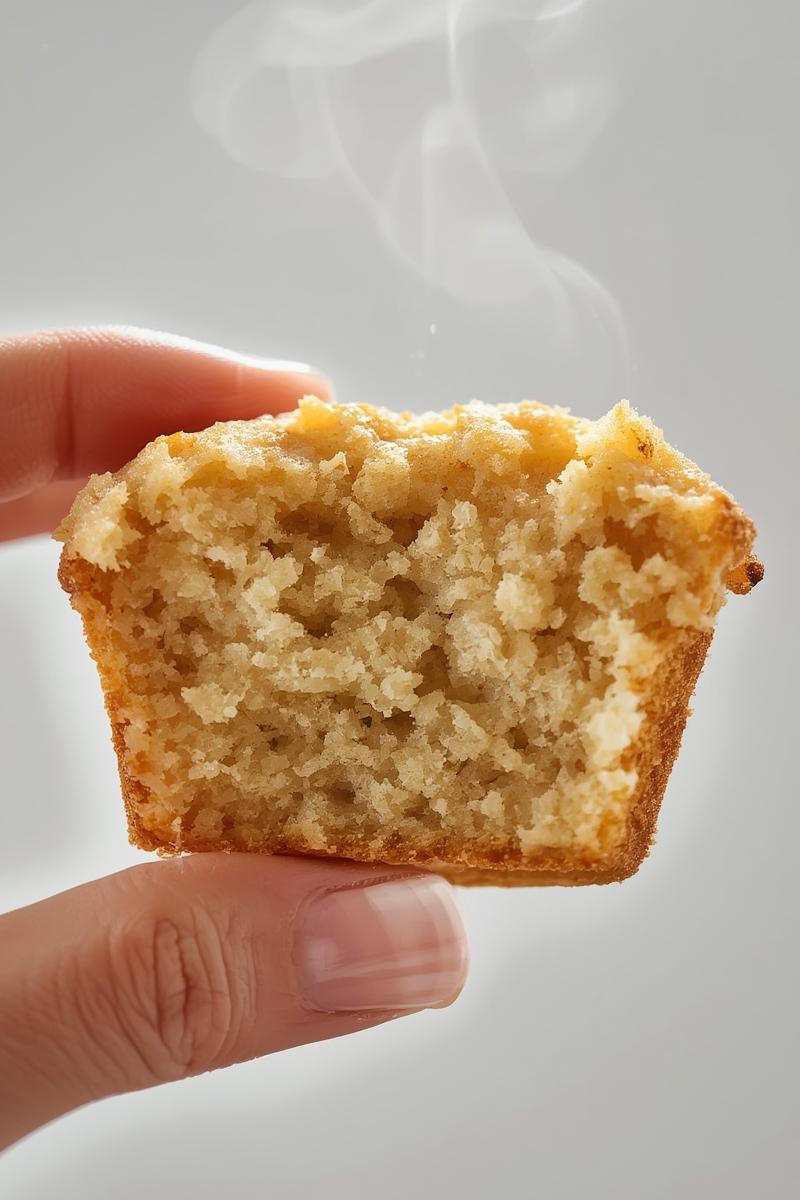
I remember one blustery Saturday morning, determined to whip up a batch of blueberry muffins for my book club. My friend, Ania, recently discovered she needed to avoid gluten, and I wanted to make sure she felt completely included. I pulled out my usual recipe, confidently swapped in a cup-for-cup gluten-free flour blend, and followed the steps. The kitchen filled with that promising sweet scent, and I just knew I had nailed it. Fast forward to pulling them out of the oven: they looked gorgeous! Golden tops, plump with blueberries. But then came the true test. One bite, and it crumbled like a sandcastle hit by a rogue wave. Dry, gritty, and profoundly disappointing. It was a classic “Pinterest fail” moment, but the frustration was real, especially when trying to create something warm and welcoming for a loved one.
Why GF Muffins Feel Like a Gamble
That day wasn’t an isolated incident. Gluten-free baking, particularly for something as seemingly simple as a muffin, can truly feel like a gamble. Where’s the elasticity? Where’s the chew? Gluten, the protein network in wheat flour, provides structure, elasticity, and that satisfying chew we associate with baked goods. When you remove it, you’re left with a vacuum that other ingredients need to fill. This quest for the perfect crumb in gluten-free muffins has led me down many a rabbit hole, but also to some wonderful discoveries. It’s about understanding the subtle science and being willing to experiment, much like when I was perfecting my viral upside-down puff pastry tart and had to adapt to different fruit moisture levels. So, if your gluten-free muffins have ever left you feeling defeated, rest assured, you’re not alone. Let’s figure out why, and how to fix it!
Diagnosing Your Muffin Mishap: What Went Wrong?
Before we can fix our crumbly catastrophes, we need to understand the root causes. Gluten-free flours don’t behave like their wheat counterparts, and understanding these differences is key to successful baking.
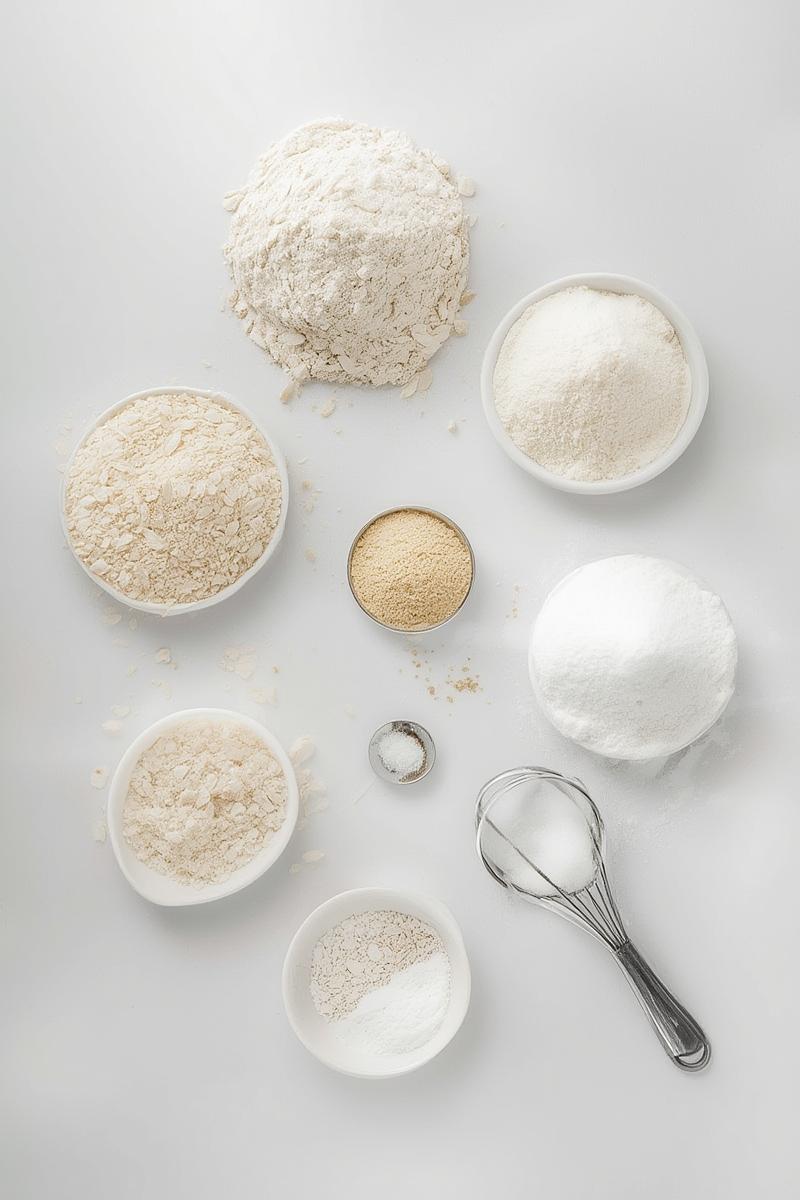
The Flour Foundation: Wrong Blend or Ratio
Many pre-made gluten-free flour blends are fantastic, but they aren’t all created equal. Some are rice-flour heavy, leading to a gritty texture. Others might lack the right balance of starches and protein-like flours. A single-ingredient gluten-free flour (like almond or coconut flour) used as a direct substitute for wheat flour is almost always a recipe for disaster; they absorb liquids very differently.
Moisture Mismanagement: Too Dry or Too Wet
GF flours are thirsty! They absorb more liquid and at a different rate than wheat flour. Too little liquid, and your muffins will be bone dry and crumbly. Too much, and they’ll be gummy and dense, refusing to bake through properly. It’s a delicate dance to get the hydration just right.
The Mixing Maze: Over or Undermixing
You might think, “no gluten, so no worries about overmixing!” But overmixing can still incorporate too much air, creating a tough texture or causing tunnels. Undermixing, on the other hand, leaves pockets of dry flour, leading to an inconsistent crumb and potentially crumbly spots.
Leavening Logic: Incorrect Agents or Amounts
Baking powder and baking soda are the unsung heroes of fluffiness. If they’re old, expired, or used in the wrong proportions, your muffins won’t rise, resulting in a dense, heavy crumb that just crumbles under pressure instead of springing back.
Measurement Mistakes: The Devil in the Details
Baking is a science, and measuring ingredients by volume (cups) can be notoriously inaccurate, especially with gluten-free flours which can vary widely in weight depending on how they’re scooped. A “cup” of one GF flour might weigh significantly more or less than a “cup” of another, or even the same flour scooped differently, leading to inconsistent results.
Binder Blues: Not Enough (or Too Much) Xanthan Gum
Xanthan gum is often the star player in gluten-free baking, mimicking gluten’s ability to bind ingredients and create elasticity. Too little, and your muffins fall apart. Too much, and they can become gummy or have an unpleasant texture. It’s a powerful ingredient that needs a careful hand.
The Rescue Mission: Solutions for a Perfect Crumb
Building a Better GF Flour Blend: The Key to Success
If you’re finding commercial blends inconsistent, try making your own! A good homemade blend often includes a mix of lighter flours (like white rice flour), starches (tapioca or potato starch), and a more absorbent, protein-rich flour (like sorghum or millet flour). For 1 cup of all-purpose flour, I often use a mix of ½ cup white rice flour, ¼ cup potato starch, and ¼ cup tapioca starch, plus a little xanthan gum (which we’ll get to!). This blend gives a lovely balance. If you don’t want to blend your own, look for a reputable, high-quality “all-purpose” gluten-free blend that specifically mentions being good for baking, and stick with it for consistency.
Hydration Hacks: Balancing Wet and Dry Ingredients
Because GF flours are so absorbent, often more liquid is needed than in a traditional recipe. Don’t be afraid to add an extra tablespoon or two of milk (dairy or non-dairy like almond or oat) if your batter seems too thick or dry. Using ingredients like yogurt, sour cream, mashed banana, or unsweetened applesauce can also add essential moisture and tenderize the crumb. Oils (like neutral vegetable oil or melted coconut oil) and melted butter contribute to moisture and tenderness too. Always make sure your wet ingredients are at room temperature to ensure they emulsify properly with the dry ingredients, similar to the precision needed for a creamy pasta sauce like my creamy Parmesan garlic beef bowtie pasta.
The Gentle Touch: Mastering the Mix
Once your wet and dry ingredients are combined, mix just until no dry streaks of flour remain. This is often no more than 10-15 gentle stirs. Overmixing develops toughness, even without gluten, because it can create too many air pockets. Undermixing, conversely, leaves those pockets of flour, resulting in a crumbly texture. A few small lumps are perfectly fine and even desirable for tender muffins!
Leavening Lift: Activating Your Baking Powders & Sodas
Always check the expiration date on your baking powder and baking soda. To test baking powder, add a teaspoon to ½ cup hot water; it should fizz vigorously. For baking soda, add a teaspoon to ¼ cup vinegar; it should also fizz strongly. If they don’t, it’s time for new ones! Using an acidic ingredient (like buttermilk, yogurt, or lemon juice) with baking soda helps activate it, giving your muffins a beautiful lift.
Precise Proportions: Weighing vs. Scooping
This is my number one tip for consistent baking, especially with gluten-free flours: invest in a kitchen scale! Measuring by weight (grams or ounces) is far more accurate than by volume. One cup of gluten-free flour can vary by several grams depending on how densely it’s packed. This small change can drastically affect the flour-to-liquid ratio. If a recipe calls for 1 cup of GF flour, look for a conversion to grams (usually around 120-140g, but check your specific blend’s recommendation).
The Binding Agent: Optimizing Xanthan Gum
Xanthan gum acts as a binder, replacing the elasticity of gluten. For most muffin recipes using a cup-for-cup GF blend without xanthan, I add ¼ to ½ teaspoon per cup of flour. Start with less and increase if you find your muffins are still too crumbly. If your GF blend already contains xanthan gum, you likely won’t need to add more. Be careful not to add too much, as it can make your muffins gummy.
Market Note: When picking up your ingredients, especially GF flours, try to find a specialty food store or a well-stocked supermarket. The variety and freshness of these flours can make a real difference. For fresh berries, definitely hit up your local farmers’ market; the vibrant colors and intense flavors of seasonal produce are unbeatable. And remember, when you’re out scouting for fresh produce, a quick stop for local, seasonal ingredients is also great for making comforting meals like hobo casserole!
Preventing Future Fails: Your GF Muffin Masterclass
Temperature Matters: Room Temp Ingredients Rule
Bringing ingredients like eggs and milk to room temperature ensures they blend smoothly into the batter, creating a more uniform texture and better rise. Cold ingredients can seize fats, leading to a lumpy batter and an inconsistent bake.
The Oven Environment: Preheat, Position, and Patience
Always preheat your oven fully before placing muffins inside. A well-heated oven helps the leavening agents activate quickly, giving your muffins that initial burst of rise. Bake in the center rack for even heat distribution. Resist the urge to open the oven door during the first two-thirds of baking time!
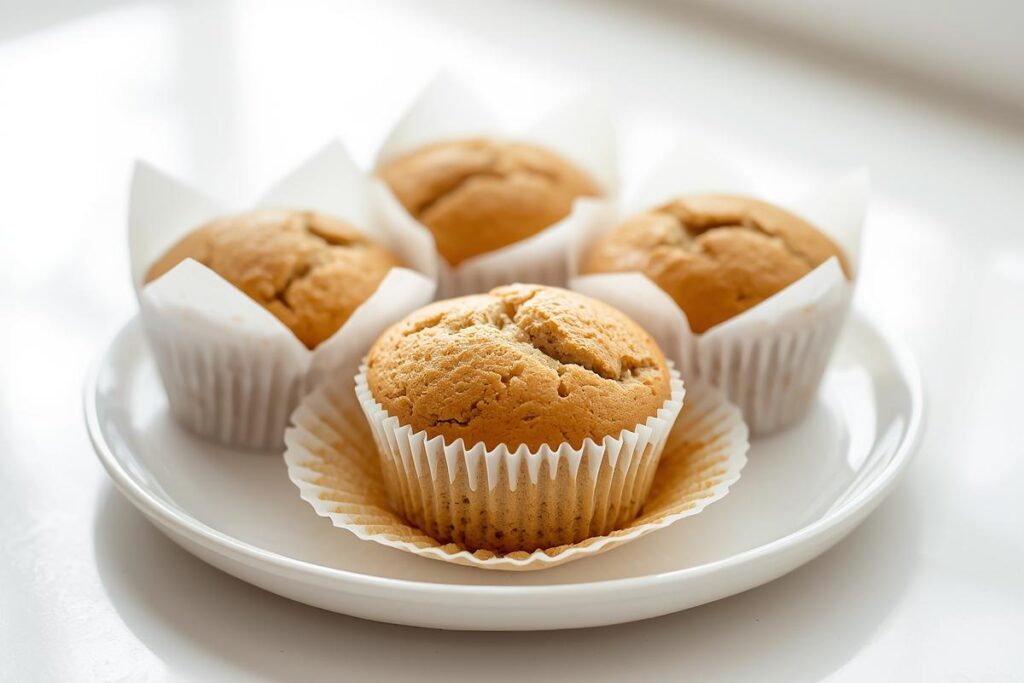
Filling the Cups: The ‘Just Right’ Amount
Fill muffin cups about two-thirds full for standard muffins. This allows for a nice domed top without overflowing. For those bakery-style “domes,” you can even fill them three-quarters full, but keep a closer eye on them to prevent overflow.
The Crucial Cool-Down: Don’t Rush It!
Once baked, let your muffins cool in the pan for 5-10 minutes before transferring them to a wire rack to cool completely. This allows the internal structure to set. Rushing them out of the pan too soon can cause them to collapse or stick. Patience truly is a virtue here!
Smart Storage for Lasting Freshness
Gluten-free muffins tend to dry out faster than traditional ones. Store them in an airtight container at room temperature for up to 2-3 days. For longer storage, wrap them individually and freeze for up to 3 months. Thaw at room temperature or warm briefly in the microwave. Don’t worry about leftover muffin crumbs either; they can be sprinkled over yogurt or ice cream for a delightful topping!
Bake with Confidence: Embrace Your Perfect GF Muffins!
Recap: Your Path to Muffin Nirvana
Baking perfect gluten-free muffins boils down to understanding your flours, managing moisture, mixing gently, ensuring active leavening, measuring precisely, and using the right amount of binder. With these troubleshooting tips and best practices, those crumbly, dry disappointments will be a distant memory. Instead, you’ll be pulling out beautifully domed, tender, and moist muffins every time, ready to share with friends and family.
Experiment and Enjoy the Process
Cooking is a journey of discovery, and gluten-free baking is no exception. Don’t be afraid to try different GF flour blends or experiment with various liquid and fat combinations. Each oven is a little different, and every ingredient has its quirks. Embrace the learning process, enjoy the aromas filling your kitchen, and celebrate every delicious success. I’d love to know if you’ve tried these tips and what kind of amazing gluten-free muffins you whipped up – perhaps with your own unique twist, like adding a pinch of cardamom or a sprinkle of poppy seeds?