
Successfully reviving a dry roasted chicken dinner is a skill every home cook can master. This guide offers practical, immediate solutions for salvaging potential food waste, transforming a seemingly lost meal into something delicious and moist with easy-to-implement flavor and moisture hacks. You don’t have to settle for dry meat ever again.
Introduction: The Dry Chicken Dilemma
I still remember those Sunday dinners at Grandma Basia’s house. The scent of roasting chicken, potatoes, and dill was a constant promise, filling the air as soon as you walked through the door. One particular Sunday, the star of the show, a beautifully browned roast chicken, came out of the oven looking magnificent. But alas, when Grandma carved into it, the breast meat was… well, a little on the dry side. My grandpa, ever the practical one, just poured extra gravy over his portion, but I saw the subtle crestfallen look on Grandma’s face. That moment, witnessing the quiet disappointment over a dish she’d poured so much love into, sparked a little quest in me. I vowed to uncover the secrets to perfect poultry and, perhaps even more importantly, how to bring a dry bird back to life. No lovingly prepared meal should ever meet the sad fate of the bin, and every cook deserves a second chance to make it delicious!
The Culinary Catastrophe: Facing a Dry Roast Chicken
We’ve all been there. You pull that glorious bird from the oven, anticipating juicy, tender meat, only to be met with a less-than-ideal reality.
The Moment of Truth: What Dry Chicken Looks Like (and Feels Like)
The tell-tale signs are usually pretty clear. Visually, dry roasted chicken often appears paler and more shrunken than its juicy counterpart, especially in the breast area. The skin, while potentially crispy, might seem brittle rather than pleasantly crackly. When you slice into it, there’s little to no glistening juice pooling on the cutting board. The meat itself can look fibrous, stringy, and even crumbly. And then, there’s the taste and texture: tough to chew, requiring extra effort, and lacking that satisfying succulence that defines a perfectly roasted chicken. It’s a moment that can make a home cook’s heart sink.
The Dreaded Question: To Toss or To Transform?
In that moment of discovery, a common question arises: do I just chalk it up to experience and discreetly discard it, or can this meal be saved? For me, the answer is almost always to transform! With a little creativity and a few simple tricks, that dry chicken is far from being a lost cause. It’s merely an invitation for a culinary adventure, a chance to improvise and create something new and wonderful.
Unmasking the Culprit: Why Your Chicken Dried Out
Understanding why your chicken became dry is the first step toward preventing it from happening again. It’s often a combination of factors, but thankfully, they’re all within a home cook’s control.
Overcooking: The #1 Offender
This is, hands down, the most common reason for dry chicken. Muscle fibers contract and squeeze out moisture the longer they cook past their optimal temperature. Chicken breast, being leaner, is particularly susceptible to overcooking. A few minutes too long, and you’ve gone from tender to tough.
Lack of Brining or Marinating: Skipping the Moisture Prep
Brining (soaking in a salt solution) helps the chicken absorb extra moisture and changes its protein structure to hold onto it during cooking. Marinating, while primarily for flavor, also adds some moisture and tenderness, especially if it contains acidic ingredients like lemon juice or vinegar. Skipping these steps can leave your chicken more vulnerable to drying out.
Uneven Cooking & Temperature Issues
Sometimes, the oven temperature isn’t what you think it is, or parts of the chicken cook faster than others. For instance, breast meat cooks faster than dark meat. If you cook the whole bird to the dark meat’s doneness, the breast will almost certainly be overcooked.
Resting, Or Lack Thereof: The Crucial Final Step
After cooking, meat fibers are tense, and juices are concentrated in the center. Cutting into the chicken immediately allows all those delicious juices to rush out, leaving the meat dry. Resting the chicken allows the juices to redistribute throughout the meat, resulting in a much moister product.
Operation Rescue: Bringing Back Flavor & Moisture
Alright, the deed is done, the chicken is dry. No worries! This is where our inner culinary improviser shines. We’re going to layer on flavor and moisture, turning that oversight into an opportunity for a delicious new dish.
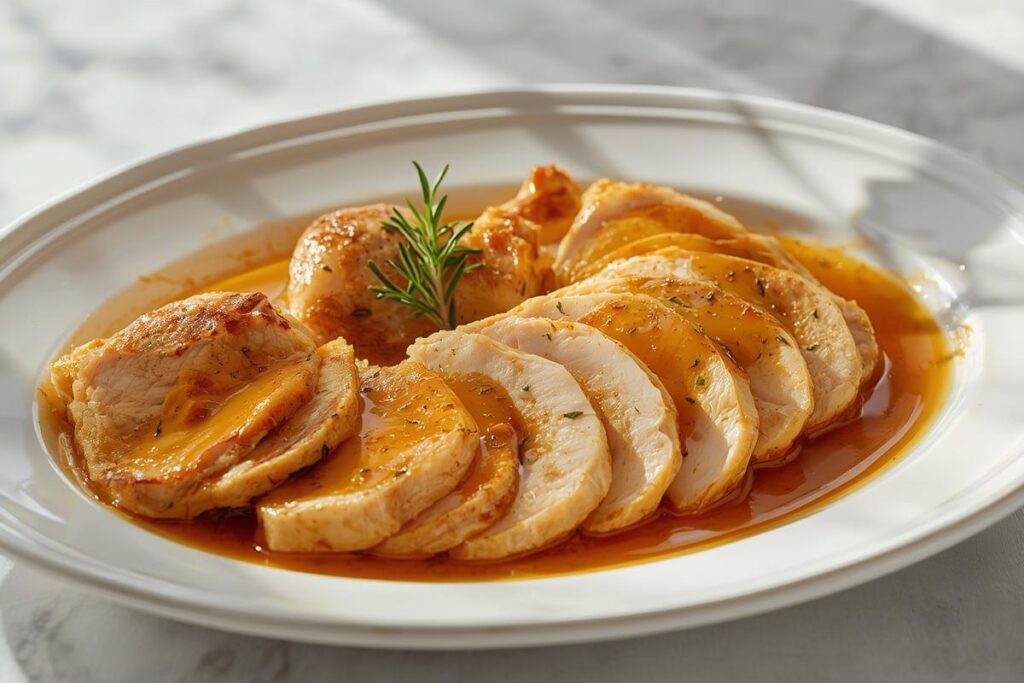
The Saucy Salvation: Drowning Out Dryness
The quickest way to add moisture and flavor back to dry chicken is with a good sauce. Think rich and flavorful rather than thin and watery.
- Gravy, Gravy, Gravy! A classic for a reason. Homemade pan gravy infused with herbs or a splash of white wine can work wonders.
- Creamy Mushroom Sauce: Sautéed mushrooms in a butter and cream sauce with a hint of garlic and thyme provides incredible moisture and earthy flavor.
- Pesto or Chimichurri: These vibrant, oil-based sauces bring fresh herbs and fats that beautifully coat the chicken pieces, adding zest and richness.
- Salsas & Chutneys: A fresh fruit salsa or a tangy mango chutney can add a burst of moisture and contrasting flavor, especially good with shredded chicken.
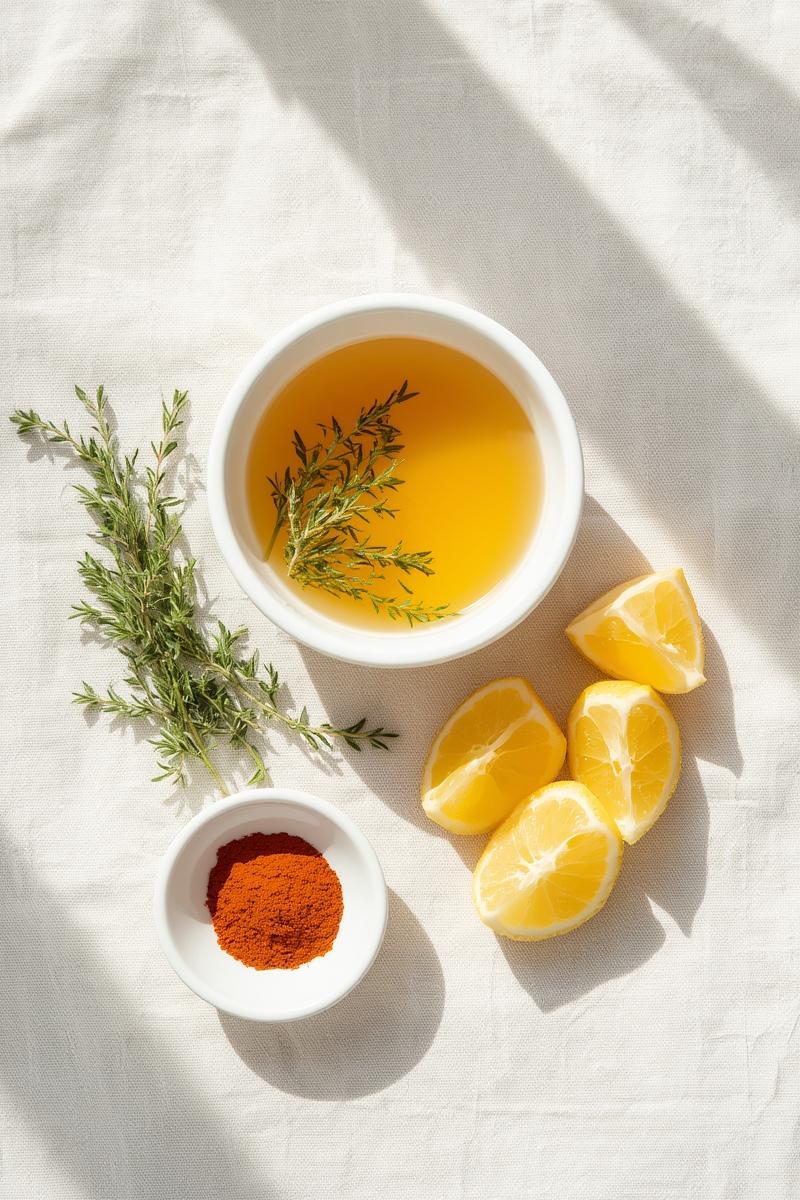
Infusion Techniques: Rehydrating From Within
Sometimes, just coating isn’t enough; we need to get moisture into the chicken.
- Gentle Simmering: Cube or shred the dry chicken and gently simmer it for 10-15 minutes in a flavorful broth (chicken, vegetable, or even a light tomato sauce). Don’t boil aggressively, just a gentle simmer to rehydrate without overcooking further.
- Steaming with Aromatics: Place shredded chicken in a steamer basket over simmering broth or water with aromatics like garlic cloves, lemon slices, or herb sprigs. Steam for 5-7 minutes until heated through and noticeably softer.
- Quick Marinades: For chicken pieces destined for stir-fries or tacos, a quick soak in a tangy marinade (citrus juice, olive oil, spices) for 20-30 minutes can help.
Kitchen Reality Check: Don’t Panic!
When you’re trying to rehydrate chicken, don’t worry if it looks a little… liquidy at first. That’s the goal! The chicken will absorb the moisture. Just be gentle with simmering or steaming; we’re not trying to cook it more, just bring it back to life. If the sauce seems too thin, let it reduce on the stove for a few extra minutes.
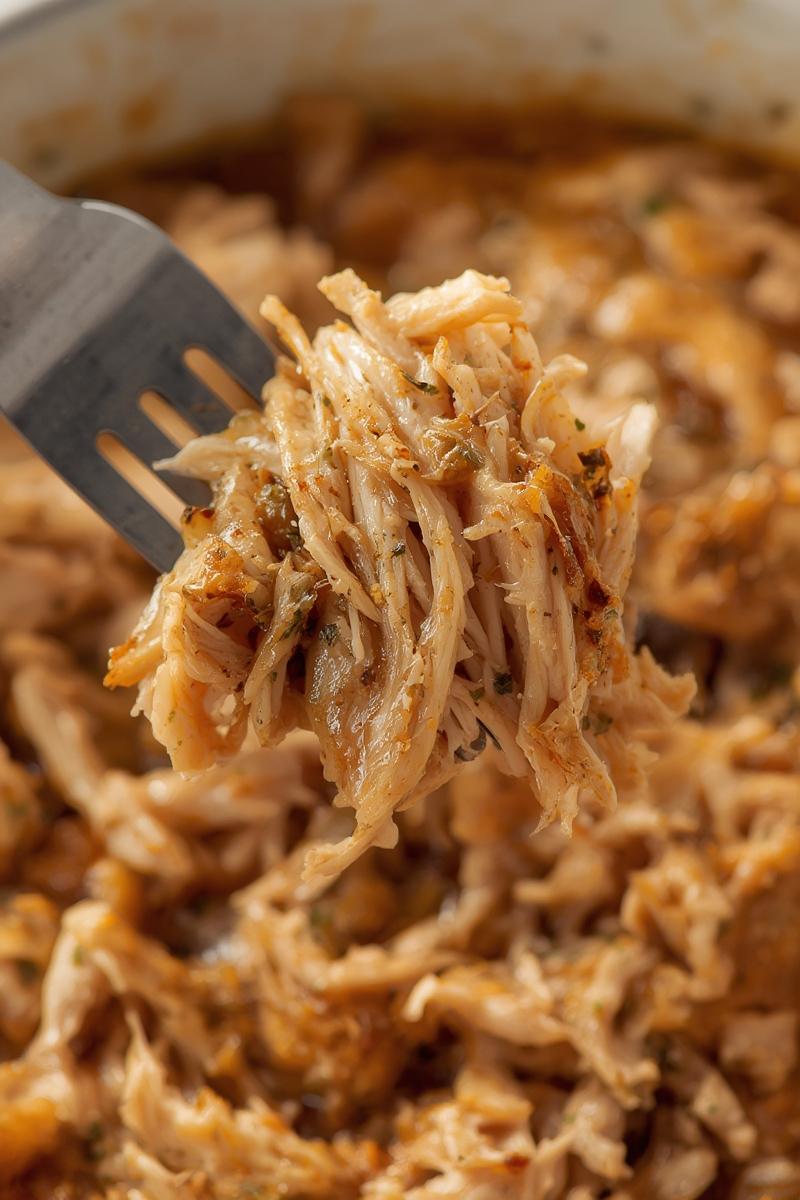
Repurposing for Revival: New Dishes, New Life
The best approach for very dry chicken is often to shred or dice it and incorporate it into dishes where its dryness can be masked or even become an asset.
- Chicken Salad Extravaganza: Shredded chicken mixed with mayonnaise, Greek yogurt, celery, grapes, and fresh herbs (dill, parsley!) is a classic for a reason. The creamy dressing and fresh ingredients completely transform the texture.
- Tacos, Quesadillas & Wraps: Toss shredded chicken with a little salsa or taco seasoning and a splash of broth, then pile into tortillas with cheese, guacamole, and sour cream. It’s amazing how a handful of flavorful toppings can make all the difference.
- Hearty Soups or Stews: Add diced chicken to the last 15-20 minutes of cooking a simmering soup or stew. It will absorb the flavorful broth and soften beautifully.
- Flavorful Bowls: Inspired by dishes like a quick Korean Ground Beef Bowl, you can create a chicken version. Combine shredded chicken (warmed in a little soy sauce and ginger) with rice, sautéed veggies, and a drizzle of spicy mayo.
- Pasta Perfection: Cube the chicken and toss it into a creamy pasta sauce – think alfredo, pesto cream, or a rich tomato sauce – for a comforting meal.
Flavor Boosters: Adding Zing Where It’s Needed
Even with moisture, bland chicken is still bland. Let’s layer in some punchy flavors!
- Fresh Herbs: Chopped parsley, cilantro, dill, chives, or basil can add incredible freshness.
- Citrus Zest & Juice: Lemon, lime, or orange zest brightens everything up and adds a hint of moisture.
- Spices & Seasonings: Smoked paprika, cumin, garlic powder, onion powder, or a good all-purpose seasoning blend can revive dormant flavors.
- Vinegars & Pickles: A splash of apple cider vinegar, balsamic glaze, or chopped pickled onions can provide a lovely tangy counterpoint.
Market Notes: Aromatic Wonders
When you’re at the local farmer’s market, always grab a bunch of fresh herbs like dill or parsley. Their vibrant flavor and aroma are unparalleled compared to dried versions and can truly elevate any dish, especially when you’re working to revive flavors. Look for bright green leaves and a strong, fresh scent!
From Disaster to Delight: Preventing Future Dry Chicken
While it’s wonderful to know how to save a dry chicken, the real victory lies in preventing it altogether. Here are my go-to strategies for consistently juicy results.
Precision Cooking: The Thermometer is Your Best Friend
Investing in a good instant-read meat thermometer is a game-changer. Roast chicken to an internal temperature of 165°F (74°C) in the thickest part of the breast, avoiding the bone. For dark meat, 175-180°F (79-82°C) is ideal. Pull it out when it hits 160°F, knowing it will continue to cook a few degrees as it rests. This precision is key to ensuring juicy results, just like knowing when to pull that perfect piece of pan-seared salmon from the heat.
Prep for Success: Brining, Marinating, and Buttering Up
- Brining: A simple brine (1/4 cup salt to 4 cups water) for 30 minutes to an hour can make a huge difference, especially for breast meat.
- Marinating: If you have time, a yogurt-based marinade or one with citrus and oil helps tenderize and flavor the chicken.
- Butter or Oil Rub: Rubbing butter (especially herb butter) or olive oil under and over the skin before roasting not only encourages browning but also helps keep the meat moist.
- Trussing: Tying the legs together and tucking the wings can help the chicken cook more evenly, preventing the breast from drying out before the dark meat is done.
The Art of Resting: Patience Pays Off
Seriously, do not skip this step! After removing the chicken from the oven, loosely tent it with foil and let it rest for at least 15-20 minutes for a whole bird, or 5-10 minutes for individual pieces. This allows the juices to redistribute, leading to significantly juicier meat.
Carving & Storage Tips for Optimal Moisture
Carve the chicken just before serving to retain moisture. For leftovers, store carved chicken in an airtight container with a little broth or gravy, if you have it. This helps keep it from drying out further in the fridge.
Your Dry Chicken Redemption Awaits!
Navigating a dry roasted chicken doesn’t have to be a kitchen calamity. Instead, consider it a delightful challenge, an invitation to embrace the joyful art of culinary improvisation. By understanding the causes and having a few clever tricks up your sleeve, you can transform a potential misstep into a triumph of flavor and texture.
Embrace the Culinary Improv
Think of your kitchen as a creative playground. Maybe you have some leftover red pesto from yesterday, or a half-eaten jar of spicy mango chutney. These are not obstacles, but opportunities! My love for adapting recipes with what’s on hand means I’m always encouraging you to look in your pantry and see what magic you can conjure.
No More Food Waste: A Win-Win
Beyond the deliciousness, there’s immense satisfaction in reducing food waste. Every time you salvage a dish, you’re doing a little happy dance for your wallet and the planet. This whole approach aligns perfectly with our ethos here at Smartly Recipes: resourceful, flavorful, and always with a modern twist.
I’d love to know what innovative twist you added to revive your chicken – did you go spicy, creamy, or something entirely new?