Why a Christmas tree cake cheesecake is perfect for the holidays.
Christmas is a time for joy, family get-togethers, and enjoying delicious treats. Among the many holiday desserts, a Christmas tree cake cheesecake is a true standout. This recipe blends the creamy goodness of a classic cheesecake with the playful look of a Christmas tree. It’s perfect as a centerpiece for holiday parties or a fun baking project with your family. Whether you’re a seasoned baker or making cheesecake for the first time, this guide will help you create a dessert that will impress everyone.
Ready to add a festive flair to your dessert table? Let’s dive into the ingredients and tools you’ll need for this holiday treat.
Ingredients for the Perfect Christmas Tree Cheesecake
To create the perfect Christmas tree cake cheesecake, you’ll need a mix of essential ingredients for the crust, filling, and decoration. To make things easier, here’s everything you’ll need, carefully broken down into sections for clarity.
Essential Ingredients for Your Holiday Tree Cheesecake
- Graham crackers or digestive biscuits: 1 ½ cups, finely crushed (or pre-made crumbs).
- Unsalted butter: 6 tablespoons, melted.
- Granulated sugar: 2 tablespoons.
- Pinch of salt: Enhances the flavor balance.
Cheesecake Layer Ingredients
- Cream cheese: 24 ounces (3 blocks), softened at room temperature.
- Granulated sugar: 1 cup.
- Vanilla extract: 1 teaspoon for a hint of warmth.
- Eggs: 3 large, at room temperature.
- Sour cream: ½ cup for creaminess.
- All-purpose flour: 1 tablespoon to prevent cracking.
Decorative Add-Ons for a Stunning Christmas Dessert
- White chocolate: 6 ounces, melted (for frosting the cheesecake).
- Green food coloring: Gel works best for vibrant shades.
- Mini star sprinkles: For the “topper” on your tree.
- Colored sugar or sprinkles: Red, gold, and silver for the tree decorations.
- Whipped cream: Optional, for borders or extra flair.
- Candy canes or chocolate shavings: Optional garnish for a festive touch.
Equipment Needed
To execute this recipe with ease, ensure you have the following kitchen tools on hand:
- 9-inch springform pan: Essential for making cheesecakes.
- Mixing bowls: At least three, for the crust, filling, and decorations.
- Hand mixer or stand mixer: For blending the cheesecake batter.
- Rubber spatula: For scraping down the sides of the mixing bowl.
- Baking sheet: To hold the springform pan and catch any drips.
- Parchment paper: To line the bottom of the pan if desired.
- Cooling rack: Allows the cheesecake to cool evenly.
- Offset spatula or piping bag: For decorating the cheesecake with the Christmas tree design.
With your ingredients and tools ready, it’s time to start baking! The next section will provide step-by-step instructions to create your cheesecake masterpiece.
Step-by-Step Guide to Making Your Christmas Tree Cheesecake
Creating the Christmas tree cake cheesecake involves several stages, from preparing the crust to crafting the festive decorations. Follow these steps to bring your holiday dessert to life.
Preparing the Crust

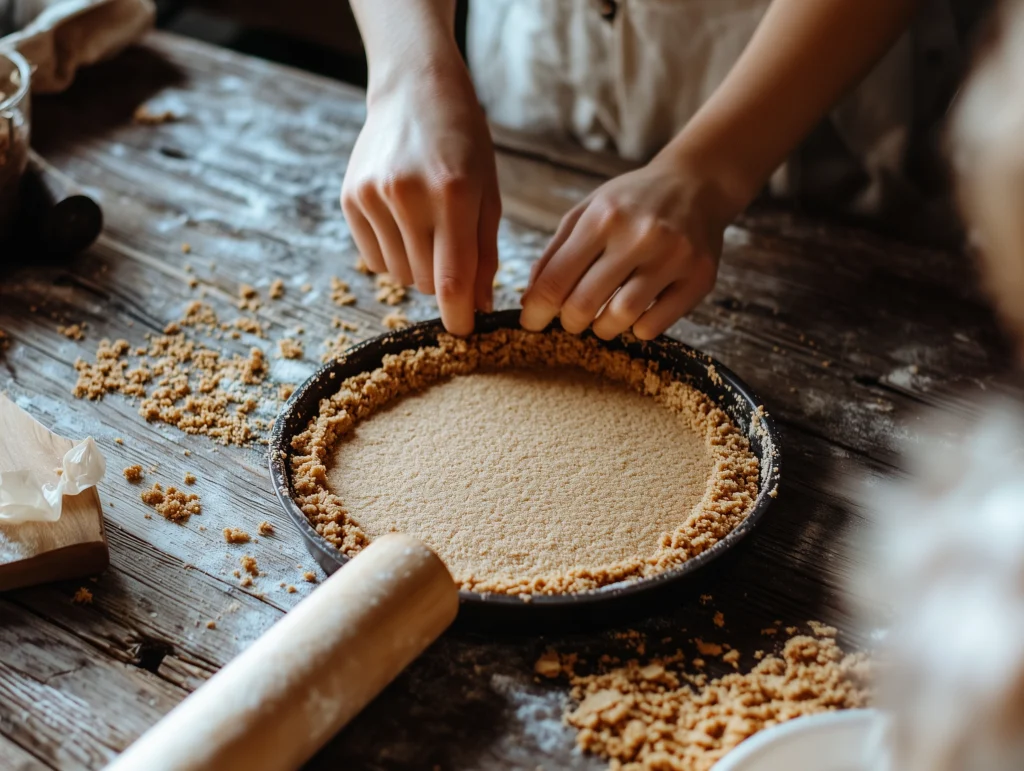
- Crush the crackers: Place the graham crackers or digestive biscuits in a food processor and pulse until finely crushed. Alternatively, put them in a zip-top bag and crush with a rolling pin.
- Mix ingredients: In a mixing bowl, combine the crushed crumbs, melted butter, sugar, and a pinch of salt. Mix until the texture resembles damp sand.
- Form the crust: Press the mixture evenly into the bottom of a 9-inch springform pan. Use the back of a spoon or a flat-bottomed glass to compact the crust.
- Chill the crust: Place the pan in the freezer for 15 minutes to set while you prepare the filling.
Preparing the Christmas Tree Cheesecake Filling
- Preheat the oven: Set your oven to 325°F (165°C) and position a rack in the middle.
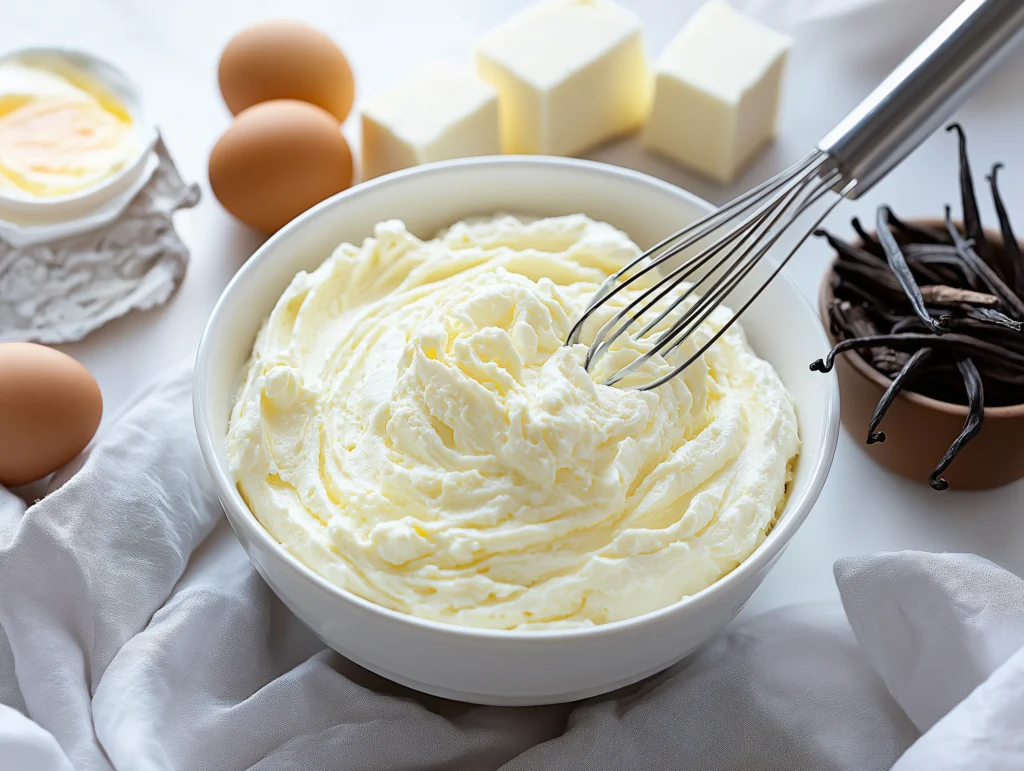
- Beat the cream cheese: In a large mixing bowl, use a hand mixer or stand mixer to beat the softened cream cheese until smooth and creamy.
- Add sugar and vanilla: Gradually add the granulated sugar and vanilla extract, beating until fully incorporated.
- Incorporate eggs: Add the eggs one at a time, beating on low speed after each addition. Be careful not to overmix, as this can introduce air bubbles that may cause cracks.
- Blend in sour cream and flour: Add the sour cream and flour, mixing just until combined. The batter should be smooth and velvety.
Baking the Cheesecake
- Prepare a water bath: Wrap the outside of the springform pan with aluminum foil to prevent leaks. Place the pan in a large roasting dish.
- Pour in the batter: Remove the crust from the freezer and pour the cheesecake batter on top, spreading it evenly with a spatula.
- Add hot water: Pour hot water into the roasting dish, around 1 inch up the sides of the springform pan. This creates a moist environment to prevent cracks.
- Bake: Bake for 60-70 minutes, or until the edges are set but the center is slightly jiggly.
- Cool gradually: Turn off the oven and crack the door open. Let the cheesecake cool in the oven for 1 hour before removing it to a cooling rack.
Cooling and Setting
- Chill the cheesecake: Once at room temperature, refrigerate the cheesecake for at least 6 hours, preferably overnight, to fully set.
- Release from the pan: Carefully run a knife around the edge of the cheesecake before unclipping the springform pan.
Decorating the Cake
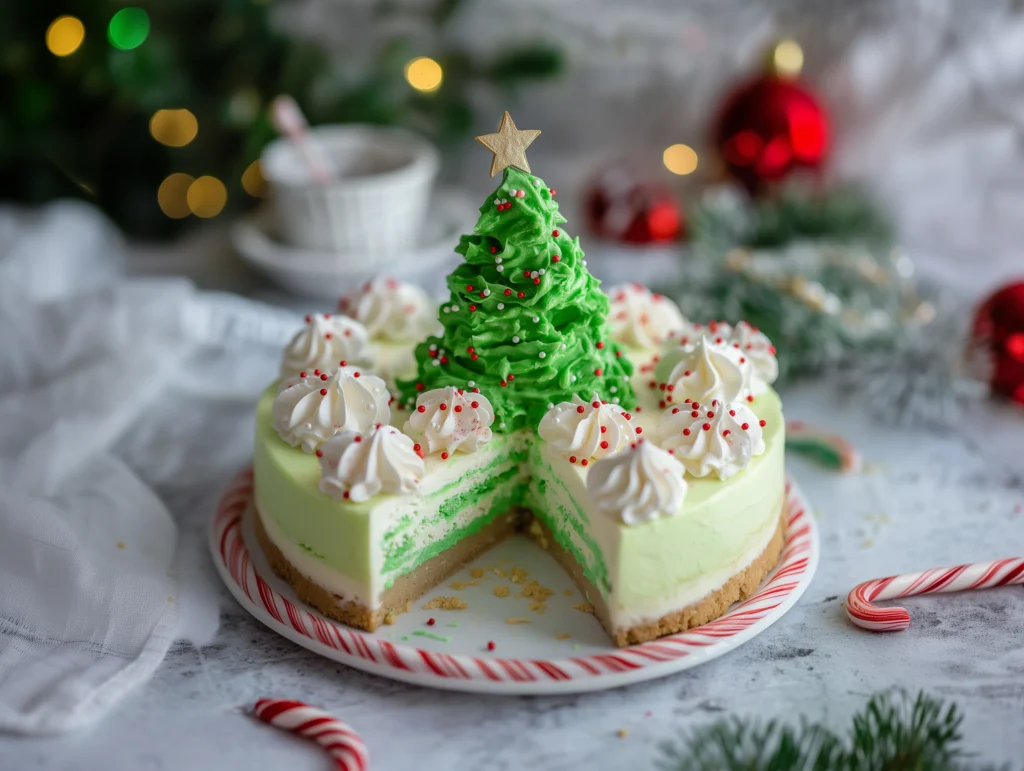
- Prepare the white chocolate: Melt the white chocolate and mix in green food coloring until you achieve the desired shade.
- Add decorations: Place mini star sprinkles at the top of the tree and use colored sugar or sprinkles to mimic ornaments. For extra flair, add whipped cream borders or candy cane accents.
- Chill again: Refrigerate for 15 minutes to set the decorations before serving.
Your Christmas tree cake cheesecake is now complete! In the next section, I’ll share pro tips for achieving the perfect cheesecake every time.
Pro Tips for a Perfect Christmas Tree Cheesecake and Recipe Variations
Creating a cheesecake that is both delicious and visually stunning takes some finesse. Here are some expert tips to help you achieve cheesecake perfection:
How to Prevent Cracks in Your Cheesecake

- Use room temperature ingredients: Ensure the cream cheese, eggs, and sour cream are at room temperature. This helps them blend smoothly and prevents lumps.
- Don’t overmix the batter: Overmixing can incorporate too much air into the batter, which may cause cracks during baking.
- Bake in a water bath: The water bath adds moisture to the oven, creating a gentle, even heat that reduces the risk of cracking.
- Cool gradually: Abrupt temperature changes can cause cracks. Always allow the cheesecake to cool slowly in the oven with the door slightly ajar before transferring it to the counter.
Enhancing the Flavor and Texture
- Use good-quality ingredients: Choose fresh eggs and high-quality cream cheese for the best taste and texture.
- Add a little spice: For a holiday twist, add a pinch of cinnamon or nutmeg to the crust or filling.
- Check when it’s done: The center of the cheesecake should jiggle slightly when baked. It will firm up as it cools.
- Chill overnight: Let the cheesecake set in the fridge overnight to boost flavor and make slicing easier.
Perfecting the Decorations
- Decorate a cold cheesecake: It’s easier to decorate when the cheesecake is chilled and firm.
- Use gel food coloring: Gel colors are bright and won’t change the texture of the frosting or chocolate.
- Try creative designs: Besides a Christmas tree, try decorating with snowflakes, gift box shapes, or wreaths for variety.
Variations of the Recipe
To customize your Christmas tree cake cheesecake, try these delightful variations:
Flavored Twists on the Classic Christmas Tree Cheesecake
- Chocolate Cheesecake: Replace ½ cup of cream cheese with melted semi-sweet chocolate for a rich chocolate base.
- Peppermint Twist: Add ½ teaspoon of peppermint extract to the filling and garnish with crushed candy canes.
- Gingerbread Cheesecake: Incorporate 1 teaspoon of ground ginger, ½ teaspoon of cinnamon, and a dash of nutmeg into the filling for a spiced holiday treat.
Decoration Variations
- Colorful Layers: To create a layered holiday effect, divide the cheesecake batter into three portions and color them green, red, and white.
- Snowy Forest Scene: For a winter wonderland look, use whipped cream to pipe snowdrifts, and then add small chocolate trees or figurines.
- Candy Ornament Toppings: Finally, decorate your Christmas tree design with festive candies, such as gumdrops or small chocolate spheres, to mimic ornaments.
Dietary Modifications
- Gluten-Free Option: Substitute gluten-free cookies or crackers for the crust.
- Dairy-Free Cheesecake: Use plant-based cream cheese, coconut cream, and a dairy-free butter alternative.
- Low-Sugar Version: Replace sugar with a sugar substitute like erythritol or stevia.
With these tips and variations, your Christmas tree cake cheesecake will not only look spectacular but also cater to diverse tastes and preferences.
Serving Suggestions
Once your Christmas tree cake cheesecake is ready, presenting it beautifully will make it the star of your dessert table. Here are some ideas to make your cheesecake look as good as it tastes.
Presentation Tips
- Serve on a cake stand: To create a focal point on your table, elevate the cheesecake on a decorative stand.
- Add a festive garnish: For extra holiday cheer, surround the cheesecake with mini candy canes, sprigs of fresh rosemary, or edible glitter.
- Slice neatly: To get clean slices, use a warm knife by dipping it in hot water and wiping it dry. Then, reheat and wipe the knife between cuts to maintain smooth edges.
- Plate creatively: Finally, serve each slice with a drizzle of chocolate sauce, a dollop of whipped cream, or a dusting of powdered sugar for an elegant finishing touch.
Pairing Suggestions
- Beverage Pairings: Serve with a cup of hot cocoa, mulled wine, or a festive cocktail like a peppermint martini.
- Accompaniments: Offer a small side of fresh berries or a tangy cranberry compote to balance the richness of the cheesecake.
- Dessert Spread: Pair the cheesecake with other holiday treats like gingerbread cookies, truffles, or fruitcake for a stunning dessert buffet.
Common Mistakes to Avoid
Even experienced bakers can run into hiccups when making cheesecake. Here’s how to sidestep the most common pitfalls:
How to Prevent Cracks in Your Cheesecake
- Overmixing the batter: Overmixing can lead to an airy batter, which may result in cracks or an uneven texture. Mix just until the ingredients are combined.
- Skipping the water bath: A water bath ensures even baking and prevents the dreaded cracks. If you’re in a pinch, place a pan of hot water on the oven’s lower rack as a substitute.
- Opening the oven door: Avoid peeking while the cheesecake is baking. Sudden temperature changes can cause the center to sink or crack.
Tips for Achieving a Smooth Christmas Tree Design
- Melted decorations: If the cheesecake isn’t fully cooled, the chocolate or whipped cream decorations may slide off. Always chill before decorating.
- Uneven tree design: Use a template or stencil if you’re unsure about freehand designs. Piping with a steady hand and practicing on parchment paper first can help.
- Overloading with toppings: Too many sprinkles or heavy decorations can weigh down the cheesecake. Aim for a balanced look.
Serving Mishaps
- Rushing the cooling process: If the cheesecake hasn’t fully set, it may collapse when sliced. Refrigerate it for the recommended time.
- Uneven slicing: Use a ruler to lightly score the surface before cutting to ensure uniform pieces.
- Forgetting the details: Small touches, like a festive garnish or polished serving utensils, elevate the overall experience.
With these serving tips and troubleshooting advice, your Christmas tree cake cheesecake will leave your guests raving and coming back for seconds.
Frequently Asked Questions About The Christmas Tree Cheesecake
Here are some commonly asked questions about making a Christmas tree cake cheesecake, along with helpful answers to ensure your baking experience is stress-free.
Can I make this cheesecake ahead of time?
Absolutely! Cheesecake tastes even better after sitting in the refrigerator for a day or two. You can prepare it up to 2 days in advance. Decorate just before serving for the freshest presentation
What should I do if my cheesecake cracks?
Cracks happen, even to seasoned bakers. Cover them with your Christmas tree decorations or whipped cream, and no one will notice. To prevent cracks, always use a water bath and avoid overmixing the batter.
Can I freeze this Christmas Tree cheesecake?
Yes! To freeze, let the cheesecake cool completely, then wrap it tightly in plastic wrap and aluminum foil. Freeze for up to 3 months. Thaw overnight in the refrigerator before serving. Add decorations after thawing.
How do I ensure the green food coloring looks vibrant?
Use gel food coloring for bold, bright colors. Start with a small amount and add more as needed, mixing thoroughly until the desired shade is achieved.
What if I don’t have a springform pan?
A springform pan is ideal; however, if you don’t have one, you can use a regular cake pan lined with parchment paper for easy removal. That said, you’ll need to be extra cautious when removing the cheesecake so you don’t damage it. Additionally, make sure the cheesecake is fully chilled before attempting to transfer it for the best results.
Can I use store-bought decorations?
Of course! Store-bought frosting, edible Christmas toppers, or pre-made candy trees can save time while still delivering a festive look.
Wrap Up Your Holiday with a Showstopping Holiday Dessert Cheesecake
A Christmas tree cake cheesecake is more than a dessert—it’s a celebration of holiday fun and creativity. With its creamy texture and playful decorations, this cheesecake is sure to make your family and friends smile. Whether you’re an expert baker or just starting out, this recipe is a fun and easy way to make your holiday gatherings extra special.
Now it’s your turn to create this festive treat. Gather your ingredients, preheat your oven, and get ready to bake a dessert as magical as the holiday season.
Happy baking, and enjoy a bright and joyful holiday!

